✎ Key Points:
» You can change your Twitch email address by accessing the website on a web browser, logging in, and clicking on the Twitch Profile icon.
» Just go to ‘Settings’ from the drop-down menu, select the ‘Security and Privacy’ tab, and edit your email by clicking on the pencil icon, entering a new email address, and saving the changes.
» If you’re changing your email, be prepared to verify the process by entering your Twitch password and confirming the change with a six-digit code sent to your new email address. Copy and enter the code to complete the email change on Twitch.
Contents
- How To Change Email On Twitch:
- 1. Open Twitch.tv and Login
- 2. Click on the Twitch Profile icon
- 3. Choose ‘Settings’ from the drop-down Menu
- 4. Click the ‘Security and Privacy’ Tab:
- 5. Click on the ‘pencil’ icon to edit the Email
- 6. Enter a New Email address & Save
- 7. Enter the Password to Verify the Action
- 8. Verify with an Email Verification Code
- 9. It’s done
- Why Am I Unable to Change Email Address Twitch:
How To Change Email On Twitch:
Now, let’s see, how to change your Twitch email address-
1. Open Twitch.tv and Login
First of all, run to your web browser, and on the search bar, search for the official website of Twitch.
For reference, you can use the given link: https://www.twitch.tv/.
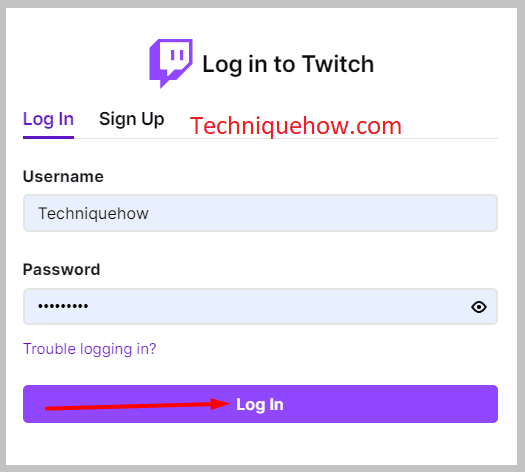
This link will take you to the official website of Twitch. When you open ‘Twitch’ on your web, you will see a video running in the center, with ‘recommended channels’ on the left side, and on the upper right corner of the screen, you will get the option to “Log in”.
Click on “log in”, enter your log-in ID and password, and open your account.
2. Click on the Twitch Profile icon
After opening your account, you will see the ‘live streaming’ of one of the channels you follow, and on the left side the activity status of the channels you follow along with the popular channels as recommendations.
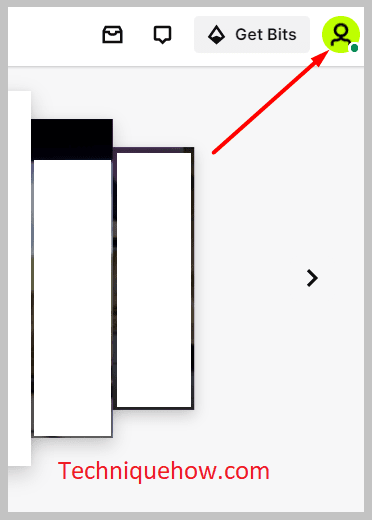
Well, you have to focus on the right side of the screen. Move your cursor to the upper right corner of the screen, where you will see your “Profile Picture” icon.
Click on the “profile picture” icon and you will land on your profile page.
3. Choose ‘Settings’ from the drop-down Menu
When you click on your profile icon, a menu will appear on the screen. From the drop-down menu, you have to select “Settings”.
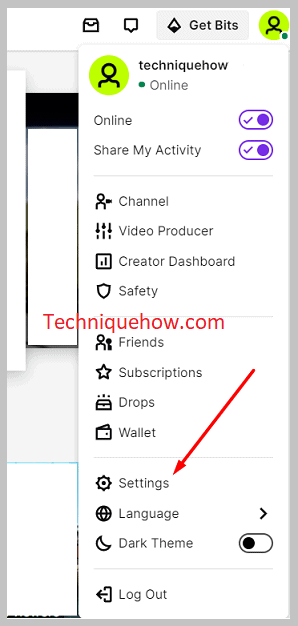
Click on the “Settings” option and open the settings tab. Under this tab, you will get the option to change your Twitch email address.
4. Click the ‘Security and Privacy’ Tab:
Now, from the “Settings” section, select > “Settings and privacy” tab.
You will find this option in the upper middle part of the settings tab. Click on it.
Under the “Security and Privacy” section, the option will be “Email”.
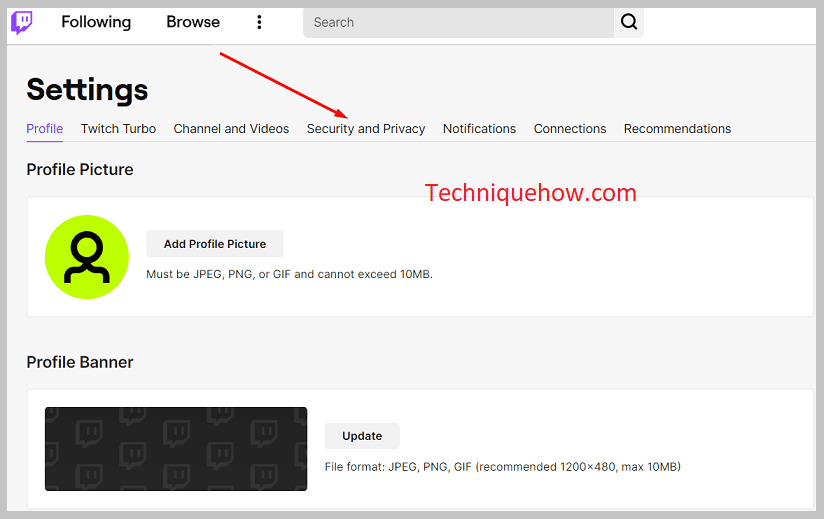
On the ‘email’ tab, the email which you have added previously is been displayed, which you can change by clicking on the “pencil” icon.
5. Click on the ‘pencil’ icon to edit the Email
To edit the email tab, you have to click on the “Pencil” icon. Click on the pencil icon and two spaces will appear on the screen under the same tab, where you can add the new email address.
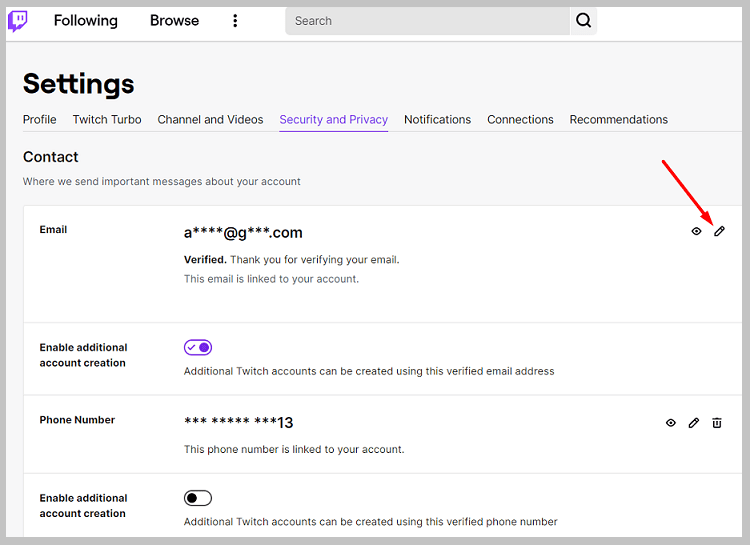
Next, ‘backspace’ the old email address to enter the new one.
6. Enter a New Email address & Save
In the given spaces, enter the new email address, that you want to add to your Twitch account and hit the “Save” button.
You have to enter the same new email address on both spaces and then click on ‘save’.
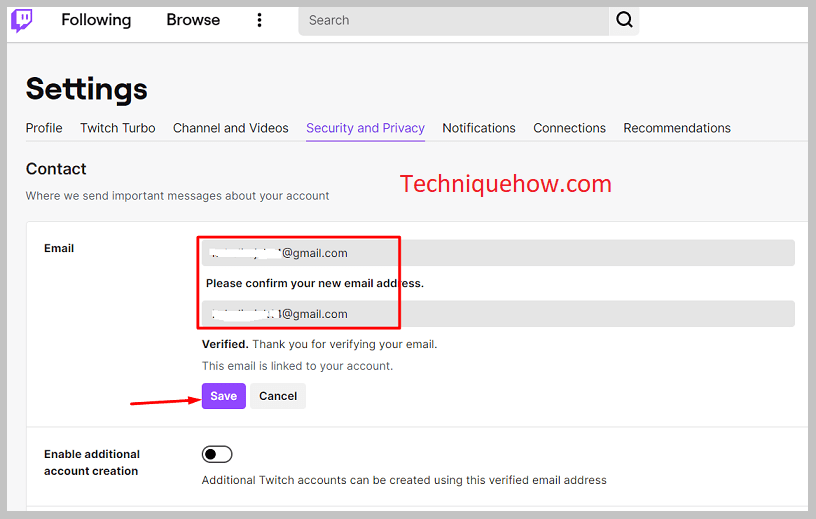
Thereafter, you have to go through a verification process, where you will be asked to enter your Twitch account password and verify the newly added email address via a verification code.
This is a simple verification process and one has to do in order to successfully change the email address.
7. Enter the Password to Verify the Action
Now, a box will pop up on the screen, which will ask you to enter your password. Here, you have to add your “Twitch” account password.
Do not get confused about, whether you have to enter your new email address password and Twitch account password.
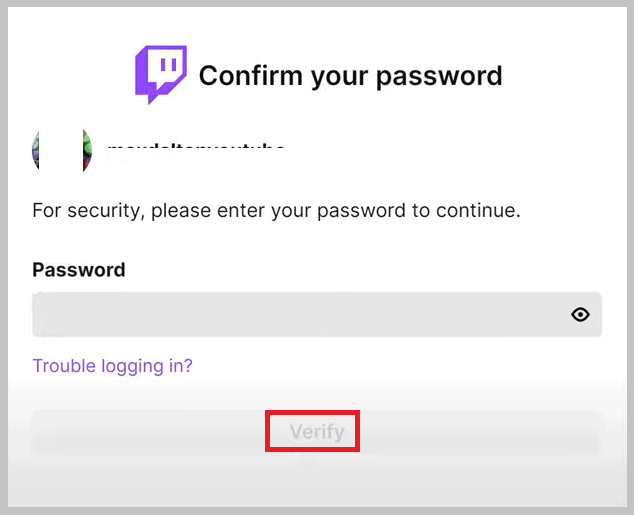
Correctly enter your Twitch account password and hit the “Verify” button at the bottom.
This step is conducted by the Twitch team in order to check, whether the genuine user is making these changes or not.
8. Verify with an Email Verification Code
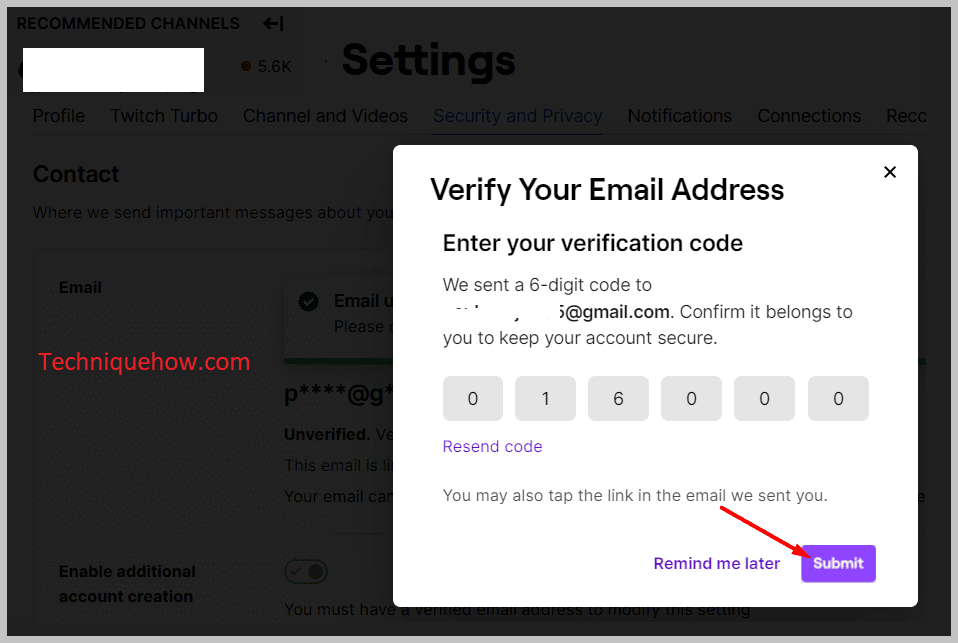
Next, after the password, you have to verify your newly added email. For that, a six-digit verification will be sent to your newly added email address.
Go and open the email and check your inbox. Open the email from “Twitch” and learn the verification code.
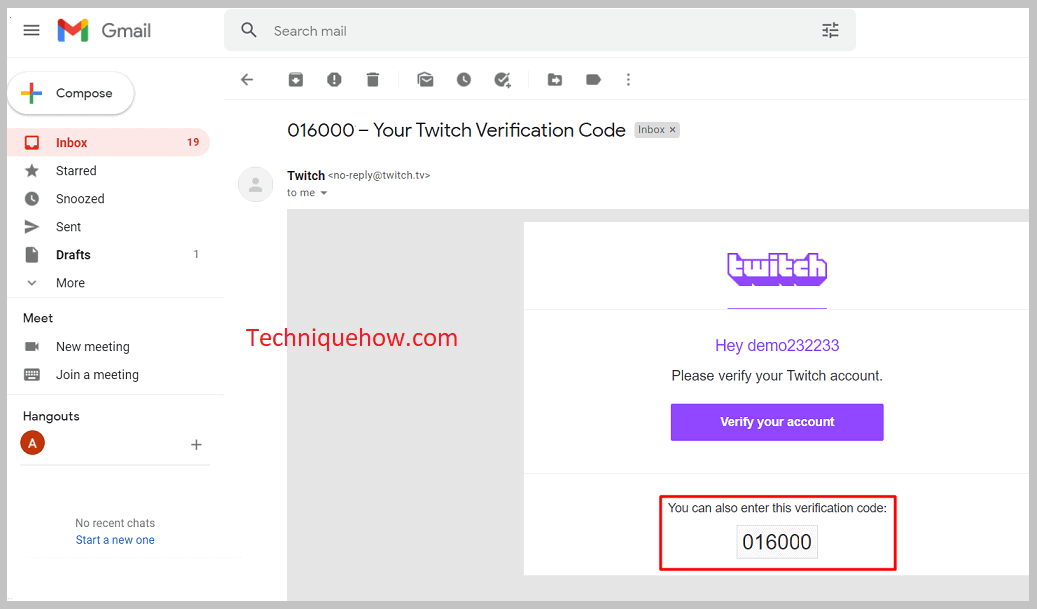
Come to the “Twitch” email verification box and enter the code. Click on the “Submit” button.
9. It’s done
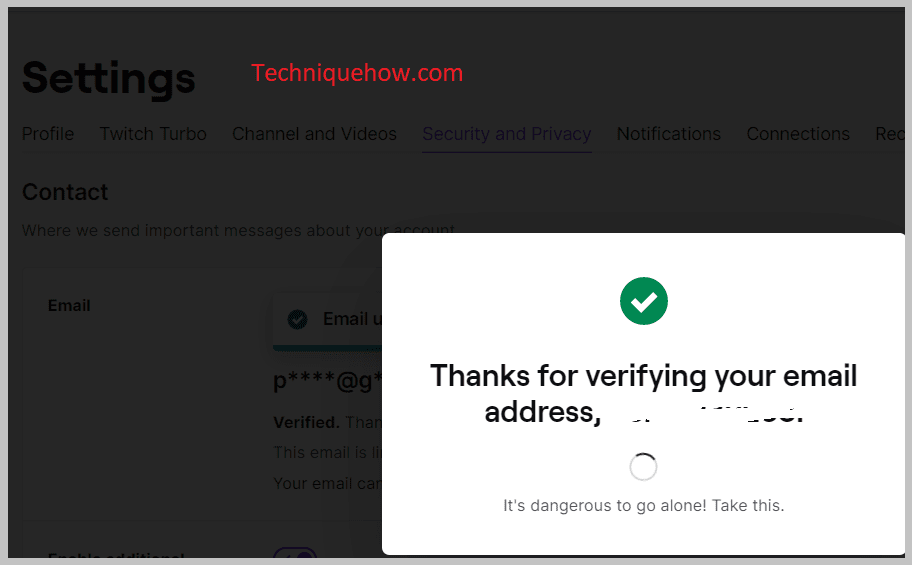
Once the email verification is done, a message will come on the screen saying, “Thanks for verifying your email address_____”.
Now, when you go back to the email tab, you will see a message, saying “Email updated successfully” which means, the process is all done and your email is updated.
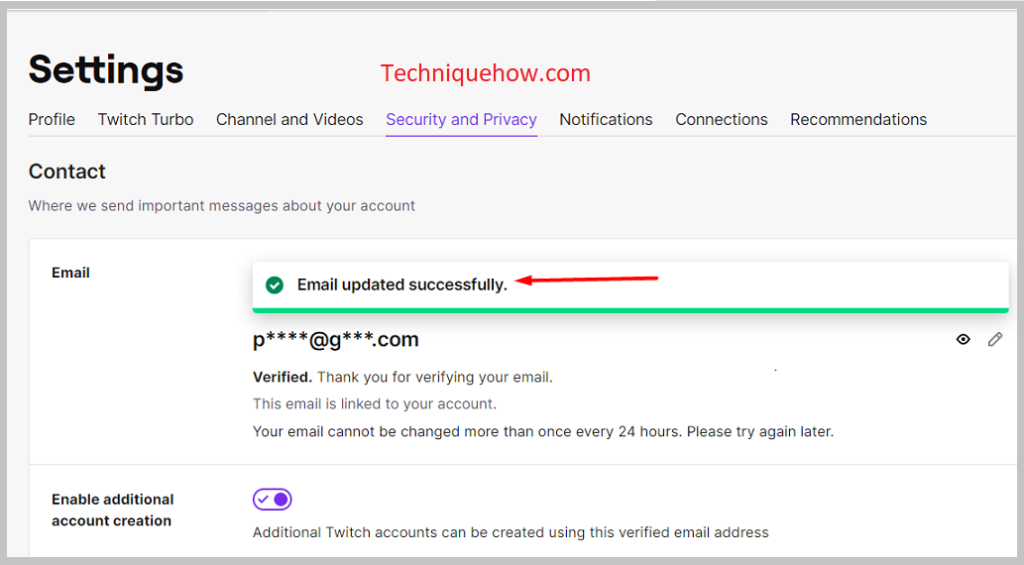
Also, do not forget to check whether the email section is updated with a new email or not.
Why Am I Unable to Change Email Address Twitch:
There can be many reasons why you are unable to change the email address on your Twitch account.
1. You have another account with that Email ID:
Check the new email ID you entered. You may have another account with that email address. If the email address that you want to add to your Twitch is already associated with another Twitch account, then, sorry boss, you won’t be able to add it here as a new (updated) email address.
Because only one account can be linked to one email address.
2. Make sure you enter the correct password:
When you try to update your email address, for verification purposes, Twitch asks you to enter your Twitch account password. Make sure you enter the correct password. If you enter the wrong password, you won’t be able to update the new email address. Hence, enter the correct password.
3. Make sure to put the correct verification code:
Next, after password verification, you can go for the email address verification, where the Twitch team will send a six-digit verification code which you have to enter here. Make sure you enter the correct verification code. Better write the code in the paper and then come back and enter by seeing it.
4. Check you entered the correct Email Address:
Lastly, check the email address properly. Check whether you have entered the email address correctly. Also, check whether you have entered the same email address in both spaces or not. The new email address has to be correct and properly working. Otherwise, you will face difficulty in updating it.
