✎ Key Points:
» You can make a Discord server public by accessing Discord on your desktop or laptop, logging in, and selecting ‘Server Settings’ from the server task dropdown in the top left.
» Try using the ‘Enable Community’ option and ‘Get Started’ to set up your public server, ensuring you carefully configure permissions during the setup.
How To Make A Discord Server Public:
First, you have to create a server, and after creating a server, by default, it is set as private; you have to change its settings manually and set it as a public Discord server.
Making a public Discord server is a very easy process, but you have to use Discord web or Discord app for PC to make it.
For the Discord mobile app, you can go to a certain step; after that, you can not proceed, and you can not finish the setup properly there. To finish the setup, you need a desktop or a laptop. Now follow the below steps to make a public server on Discord.
Step 1: Open the Discord app on your PC & Login
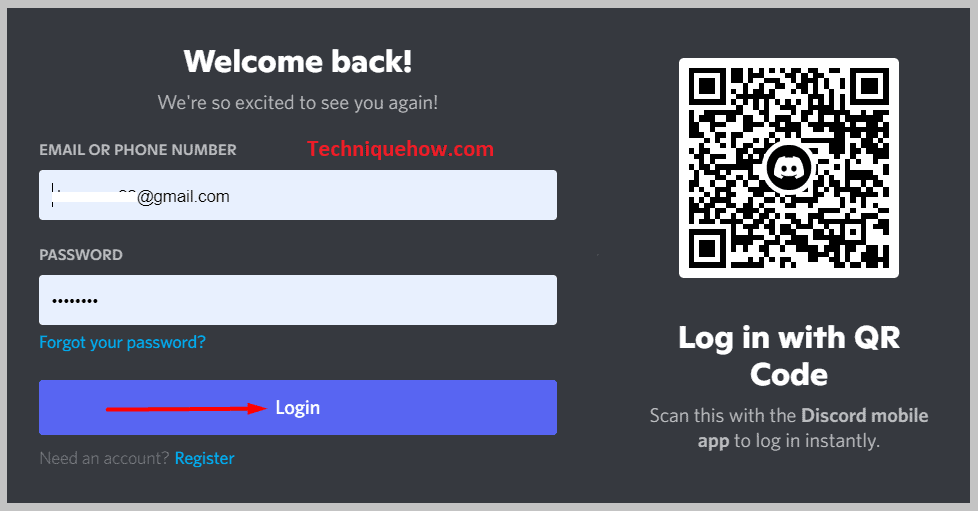
Search Discord on your browser, go to the ‘Login’ page, enter your email/phone number and password, and log in or log in with a QR code.
Open the Discord app on mobile, go to your profile, tap the ‘Scan QR Code’ option, set your camera to the desktop’s screen, and log in to your account. After logging in to your account, you will enter the Discord homepage.
At the left of the screen, you can see a ‘+’ sign over there. Click on it, then select the mode of the server that you want to create, and then again choose whether you make your server for a community or your friends. Then enter your server name and upload your server’s profile picture. Then tap ‘Create’.
Step 2: Tap on ‘Server Settings’
In the left column of the screen, all the servers you have created or joined. Click on the server you have just created, and you can see a pop-up from the left side of the screen containing the information about your server’s channels.
If you have already created channels, you can see them there, and if it is not, Discord gives a server one ‘TEXT CHANNELS’ and one ‘VOICE CHANNELS’.
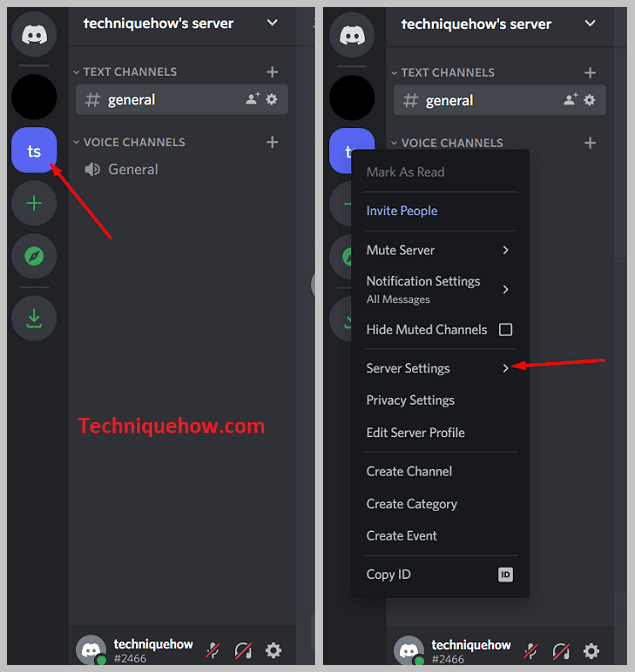
You can see your server name at the top of these channels’ names, and just beside it, there is a downward arrow. Click on it, and many options will open, tap the second option, ‘Server Settings’.
After clicking on the ‘Server Settings’ option, a new window will open with three subsections: ‘YOUR CHANNEL’S NAME’, ‘COMMUNITY’, and ‘USER MANAGEMENT’.
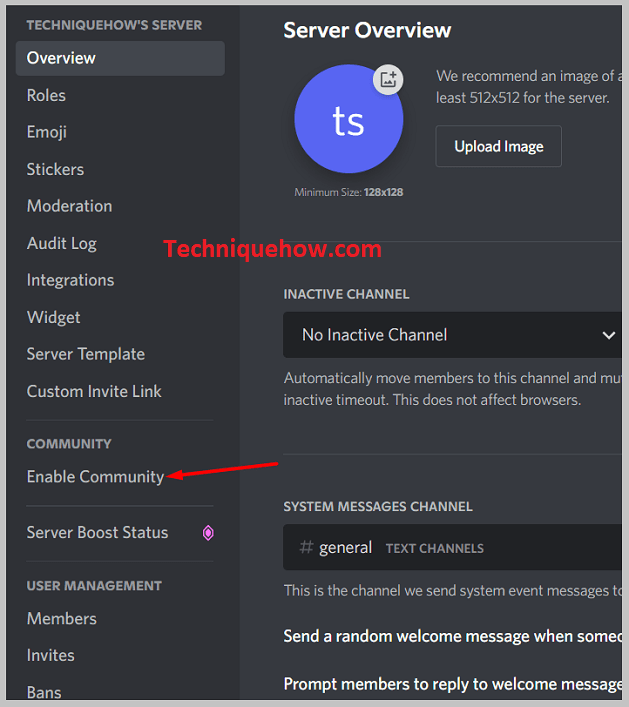
You can make the basic changes to your server from these sections like changing the name of your server, uploading your Discord server’s profile picture, uploading emojis, stickers, etc. Now to proceed further click on the ‘Enable Community’ option under the ‘COMMUNITY’ subsection.
Step 4: Select the ‘Get Started’ option
After clicking on the ‘Enable Community’ option, a new screen will appear where they will ask you to convert your server to a community server.
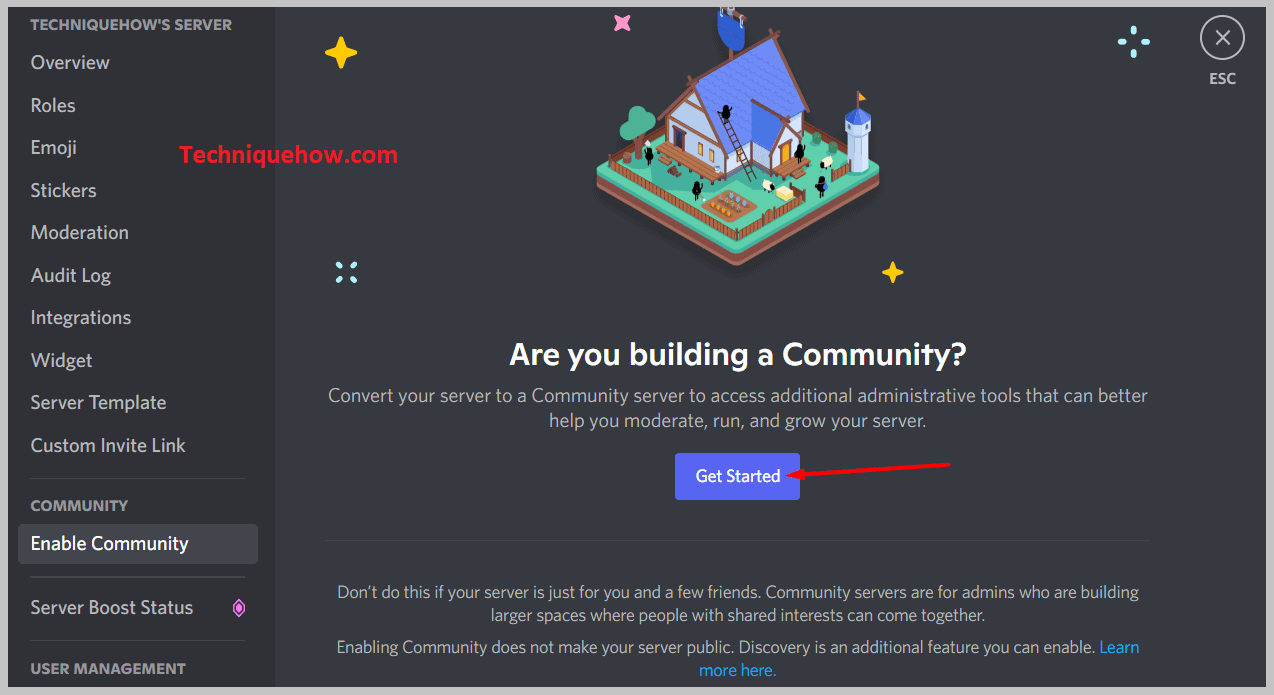
Converting your server as a community service will help you access additional administrative tools to help you moderate, run, and grow your server. To do that, tap the ‘Get Started’ option showing in the middle of the screen.
Step 5: Give the permissions and finish the setup
After clicking on the ‘Get Started’ option, a new screen will come up where you have to verify yourself. First, you will enter the ‘Safety checks’ section where you have to give a tick on both the boxes of ‘Verified email required’ and ‘Scan media content from all members’.
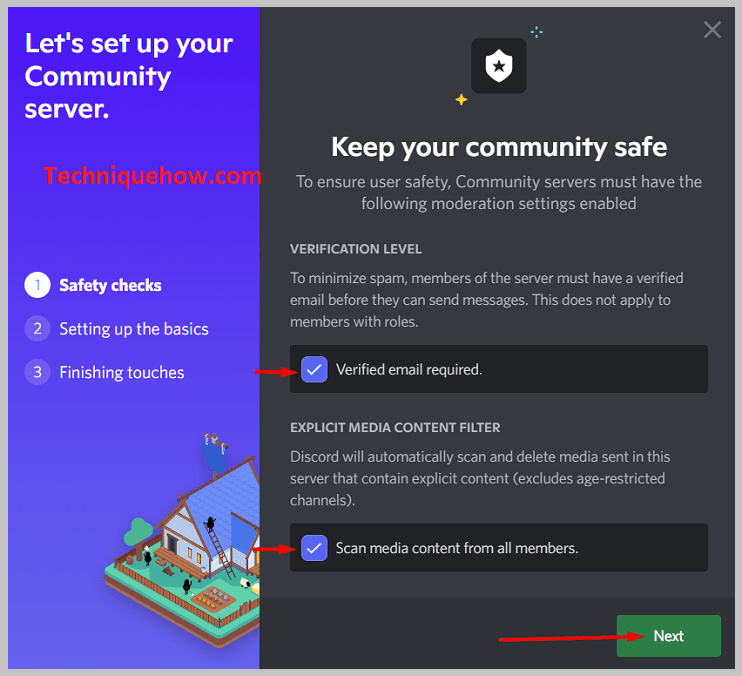
Then select ‘Next’ and enter the next section, ‘Setting up the basics’. Here you have to choose one option from the sections ‘Create one for me’ or ‘#general’ to determine where Discord sends the server updates, rules, and guidelines.
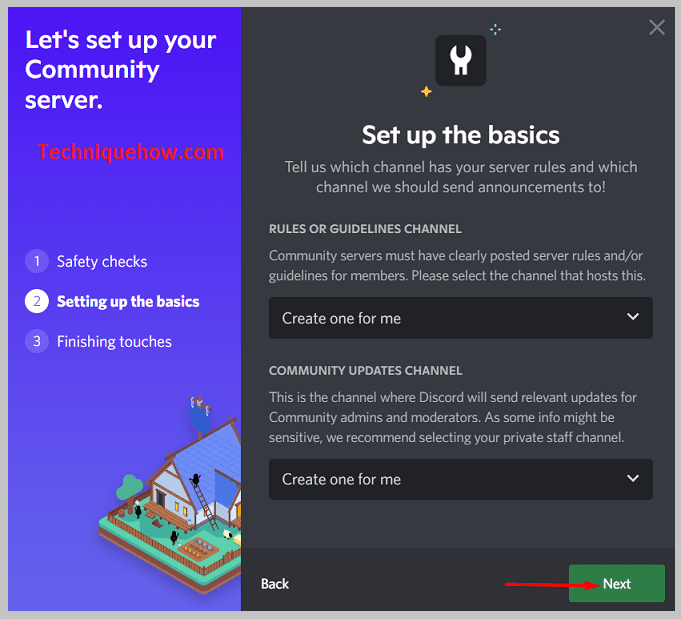
Again click ‘Next’ and enter the last section, ‘Finishing touches’. In this section, you can choose whether you remove moderation permission from everyone and default notifications to mentions or not.
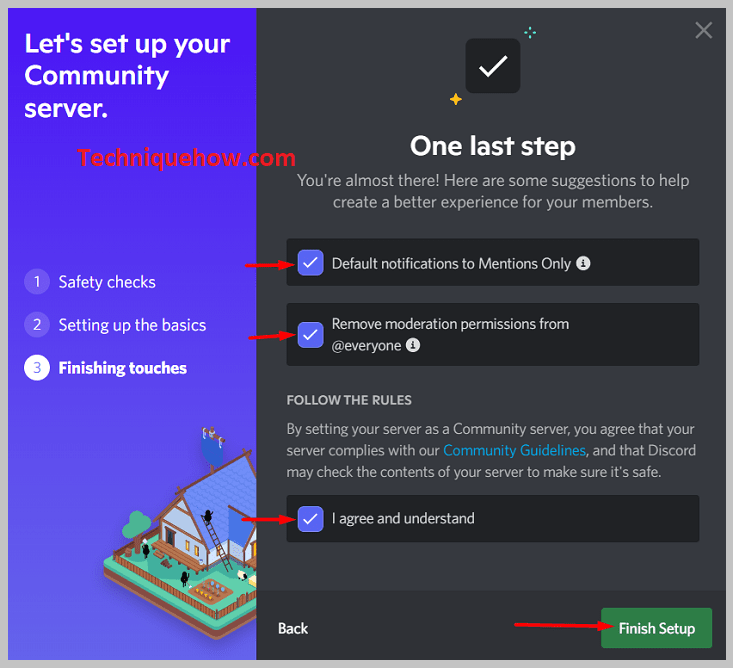
Then give a tick on the ‘I agree and understand’ box after reading their community guidelines, and at last, tap ‘Finish Setup’.
Step 6: Click on ‘Apply for Discovery’
After clicking the ‘Finish Setup’ option, a new screen will appear with the sections like ‘Set up Welcome Screen’, ‘Apply for Discovery’, and ‘Check Server Insights’.
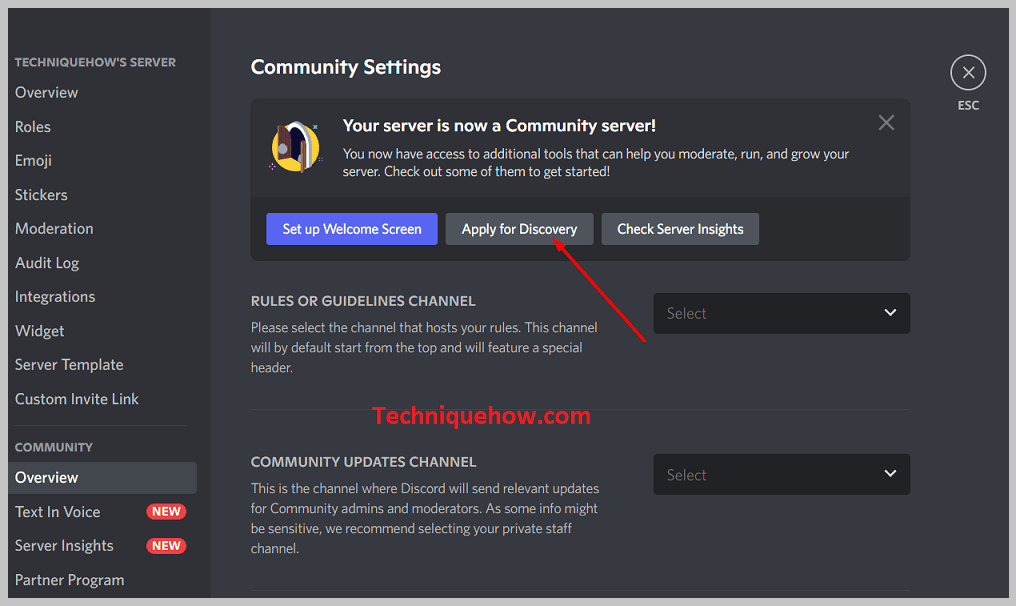
Scroll down the page, and you can set your server’s primary language and server description from here, and you can disable your community from here.
Now tap on the ‘Apply for Discovery’ option, and another screen will open where you have to select the ‘Set Up Discovery’ option, which will appear in the middle of the screen.
List of Requirements that Your Server Needs:
However, before enabling Discovery, you need to hit the minimum requirements. Here’s a list of requirements you need to maintain on your server before doing that.
◘ Your server should abide by Discord’s community guidelines.
◘ Your server needs to have at least 1,000 members to be eligible for this feature.
◘ Your server should be at least 8 weeks old; new servers can’t make the changes.
◘ Server insights need to be enabled for at least 200 members required to meet certain activity requirements.
◘ No bad words in your server name, description, or channel names will be tolerated.
◘ You have to enable 2FA, which is required for moderation.
You have now successfully made a public discord server on your PC:
After you reach certain server discovery requirements, you will successfully convert your private Discord server to a public Discord server. Now you can customize your Discord server and make it more attractive for the other Discord users to join.
