✎ Key Points:
» You can create reaction roles on Discord by accessing your server settings, clicking on Roles, and adding roles by typing names under the ROLE NAME box.
» Just turn on the option to display role members separately, and save changes to ensure proper role visibility.
How To Make Reaction Roles On Discord:
Follow the steps below:
Step 1: Click on Server Name
If you’re looking forward to making reaction roles on the Discord server, you’ll need to start the process by opening your Discord server from your PC.
You’ll have to go to Discord.com and then log in to your account using the correct login credentials. Then you’ll be directed to your server page.
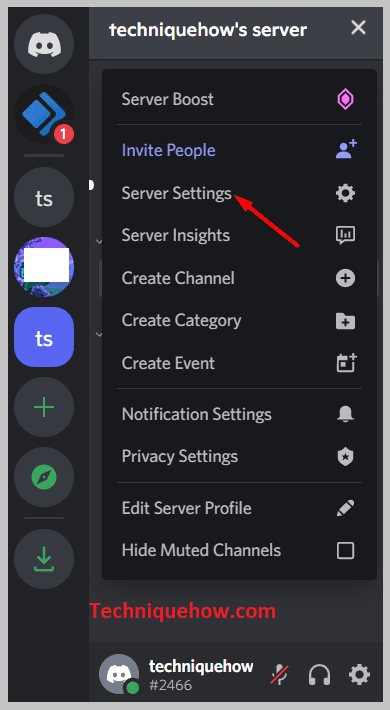
On the top left of the server, you’ll be able to see the name of your server. You’ll need to click on the name of your server and then it will display a list of options.
The list has options to Invite People, Server Settings, Create Channel, etc. But for this method, you’ll need to click on the second option i.e. Server Settings.
Step 2: Click on Roles
After you click on the Server Settings, you’ll be taken to the settings of your Discord server. On the settings page, you’ll be automatically redirected to the Overview section where you will be able to see the details of your server such as its name, the profile picture of your server, its region, etc.
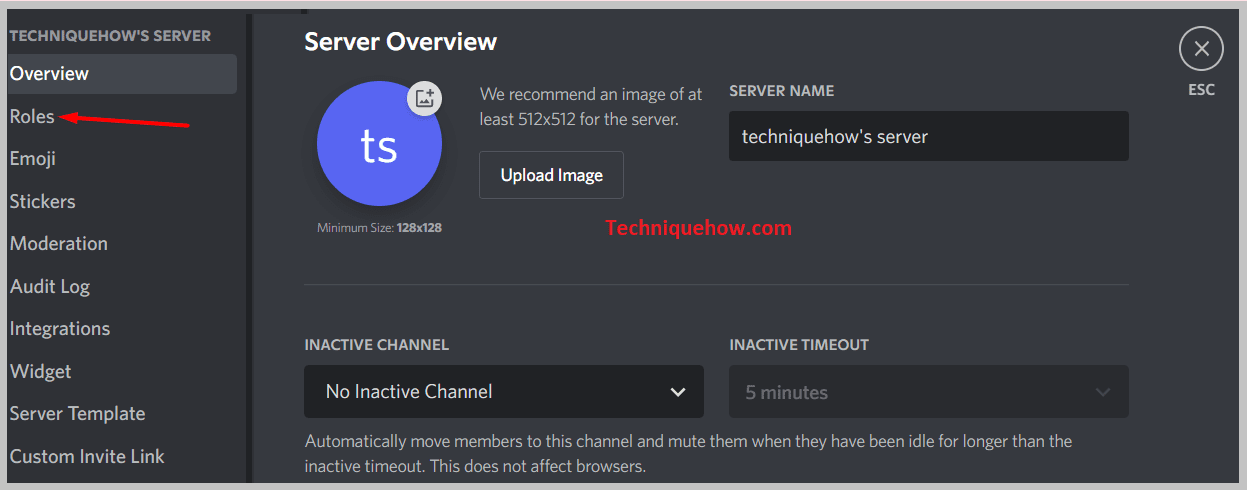
On the left sidebar of the screen, you’ll be able to see a bunch of options displayed in a list. The list would be displayed as Overview, Roles, Emoji, Moderations, etc. You’ll have to click on the second option from the list i.e Roles to get into the Roles section of your Server Settings.
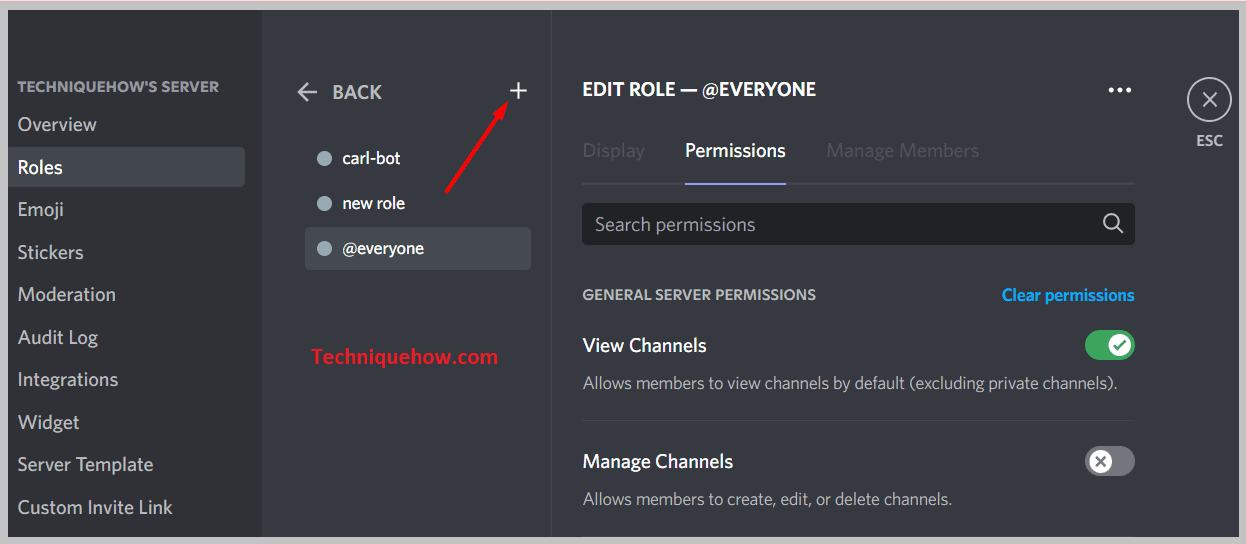
After you click on Roles from the left sidebar, you’ll be displayed with the Roles page in the center of the screen. You’ll see that there’s a header called Roles and next to it, there’s a small + sign in a circle. You’ll need to click on the + sign and then it will add one new box just below with the name new role.
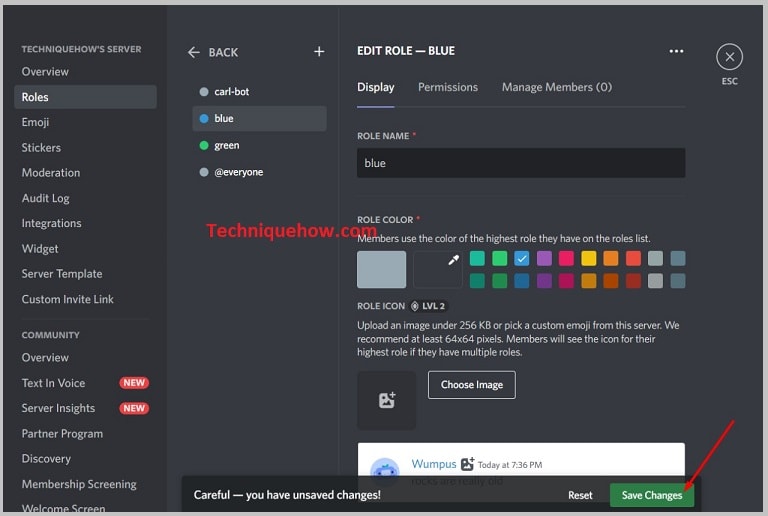
On the right section of the screen, you’ll be able to see a box below the ROLE NAME header. You’ll need to click on the box and erase the words new role and then type the name of the role there and select a color for the role from the color box that’s displayed just below the role name box.
After you’ve successfully created a role, you’ll need to turn on the switch next to Display role members separately from online members.
You’ll see that your newly created role will get added to the center column. You can add as many roles as you want by clicking on the + button and following the same method. Then click on the Save Changes option that’s displayed at the bottom of the screen.
Step 4: Put your question in any text channel
After you’re done creating the roles, you’ll need to save the changes made and then exit the window by clicking on the cross sign.
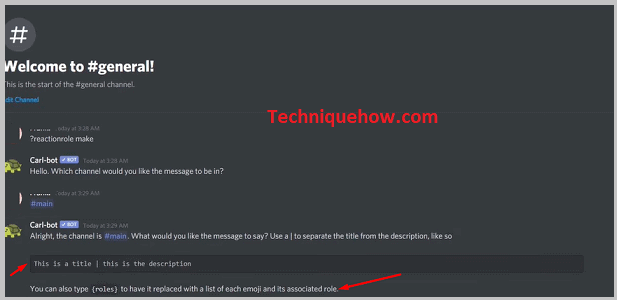
You’ll be asked a question: Which channel would you like the message to be on? You’ll need to answer the question and to do that you’ll need to choose anyone from all the channels you’ve on Discord. So you can type #main on the message box and then send it. It’s basically saying you want to send the message to the main channel.
Step 5: Provide title and description
After you’re done selecting the channel, you’ll be asked to put the title and the description of the roles. Therefore, start by typing the title of the role in the message box, and then you’ll need to separate the title from the description by placing a | sign.
Then type a short description of the role. You can also type {roles} which you can later replace with the appropriate emoji associated with the roles.
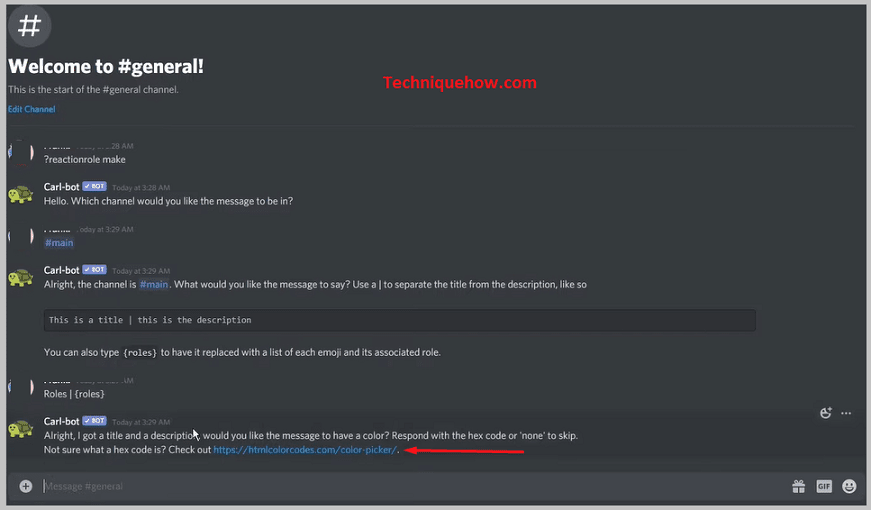
After you’re done typing the title and the description, send it. Next, they’ll respond to your text with a link. You’ll need to click on the link to choose a color for the messages.
Step 6: Click on the link & copy the color name & paste
On the message, you get a link. Open the link by clicking on it and you’ll be taken to a website where you’ll need to pick a color from the color box.
You can hover your mouse all over the color box to choose the perfect color for your message and then the name of the color that you choose will appear on the top of the color box. You have to copy the name from there by selecting it and then pressing control +C.
Come back to the previous page and then you’ll need to paste the name of the color that you just copied, in the message box and send it.
Step 7: Add Roles and type Done
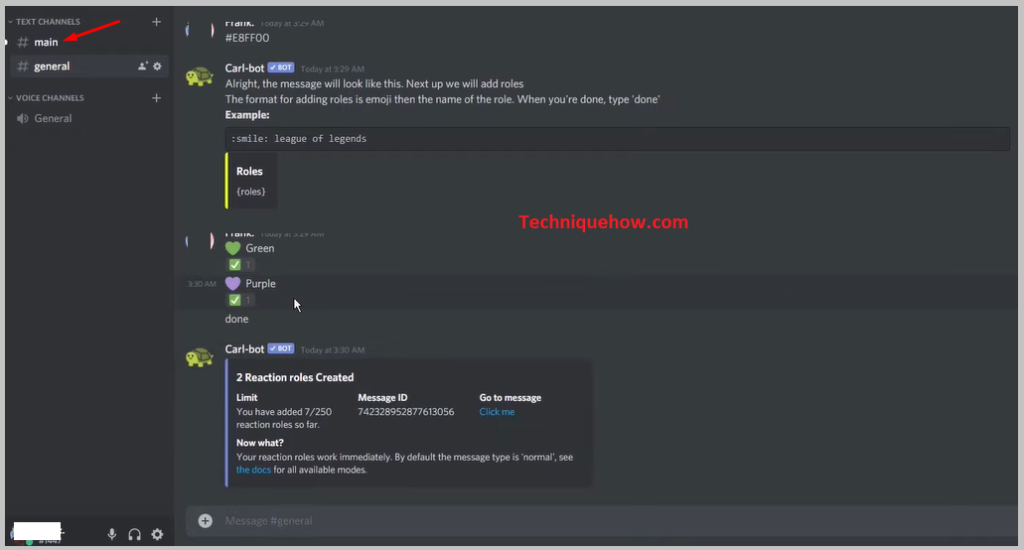
Then you’ll need to add your roles. To add the roles, you’ll need to click on the emoji icon that’s on the right side of your message box and then it will be displayed with an emoji box. All you have to do to add roles is to click on one emoji and then type the name of the role and send it. You can repeat the process for as many roles as you want.
You’ll find that after you send the roles, the message is verified with a green tick mark below it. After you’re done with adding the roles, type Done and send it. It will confirm a message stating the number of roles that have been created by you along with the message ID.

Go to the main channel by clicking on #main and then you’ll need to check if the roles are added or not. If they’re added, you’ll be able to find them displayed on the screen. You can change the color of your name by reacting to the colors of the roles.
How to invite Carl.GG bot to Discord Server:
🔴 Steps To Follow:
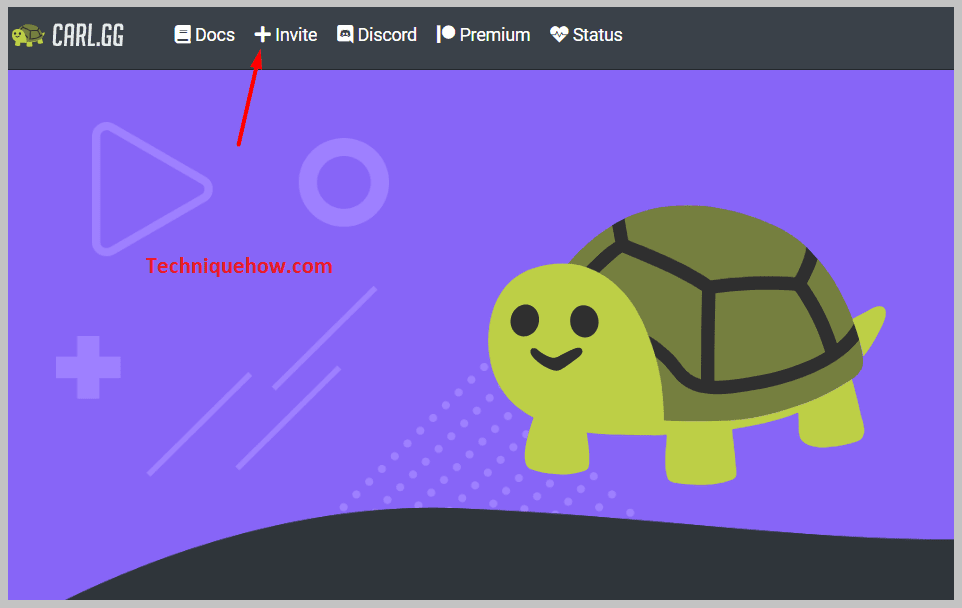
Step 1: You’ll need to start by clicking on the link below to get redirected to the website of Carl Bot directly. http://carl.gg/
Step 2: Next, at the top of the page, you’ll find a panel of options, from there click on the second option i.e Invite. This is selected to invite Carl.GG to the server.
Step 3: You’ll be taken to the next page where you’ll need to click on the ADD BOT TO box and you’ll be displayed with a range of options. You can select the account which you want to add the bot.
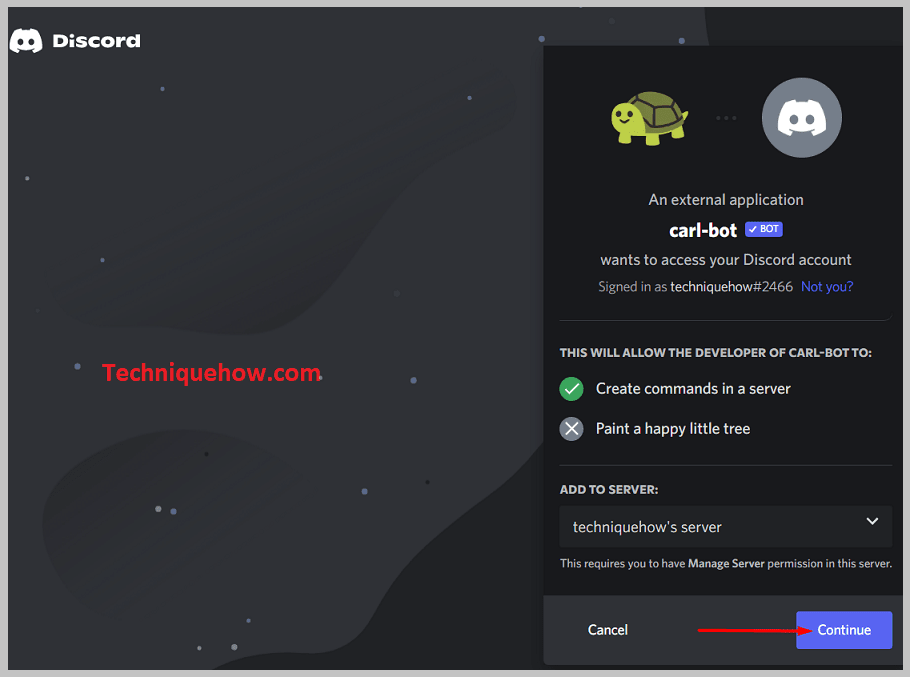
Step 4: Then move ahead by clicking on the blue Continue option.
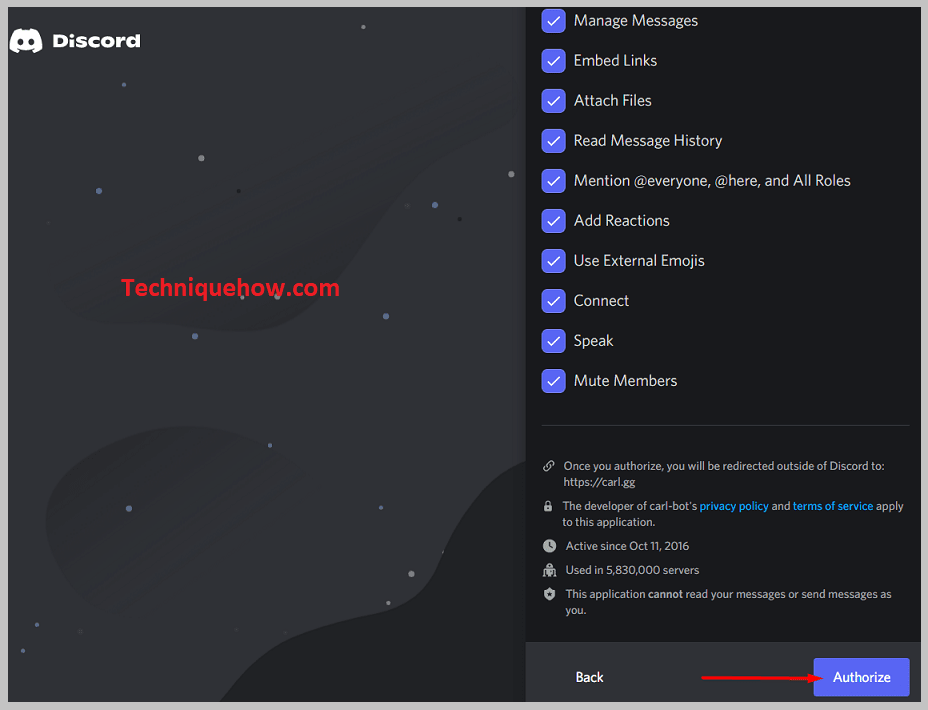
Step 5: Next, you’ll be displayed with some options on the next page that are already selected. You’ll just need to click on the Authorize button.
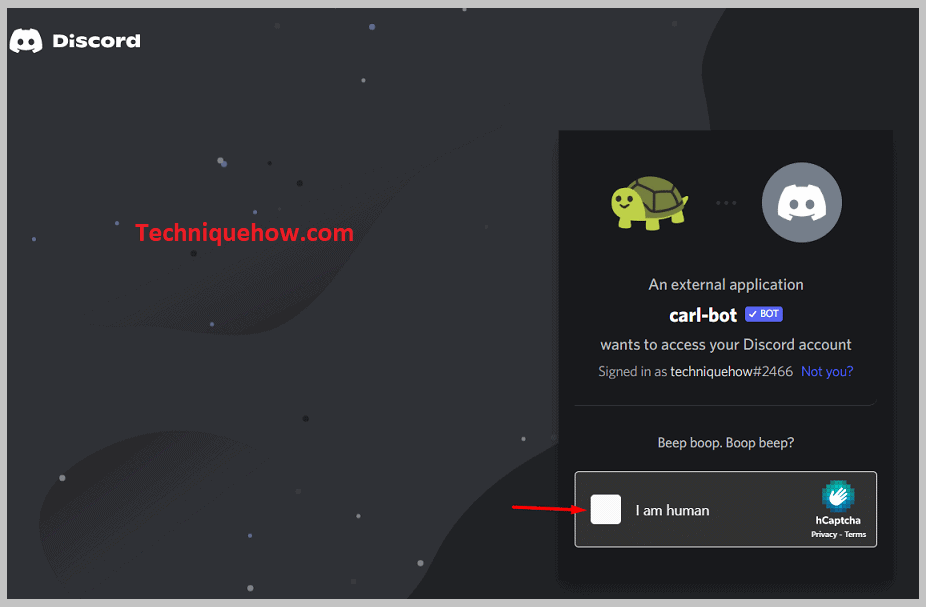
Step 6: You’ll be taken to the new page where you need to perform the human verification process by clicking on the square box next to I’m not a robot. It will show you as Authorized.
Step 7: Then if you head on to your discord server, you’ll be able to see that Carl Bot is there on your Discord server. To see that, look at the right column of your Discord server’s page from your PC and you’ll find the name of Carl Bot right at the top under the ONLINE header.
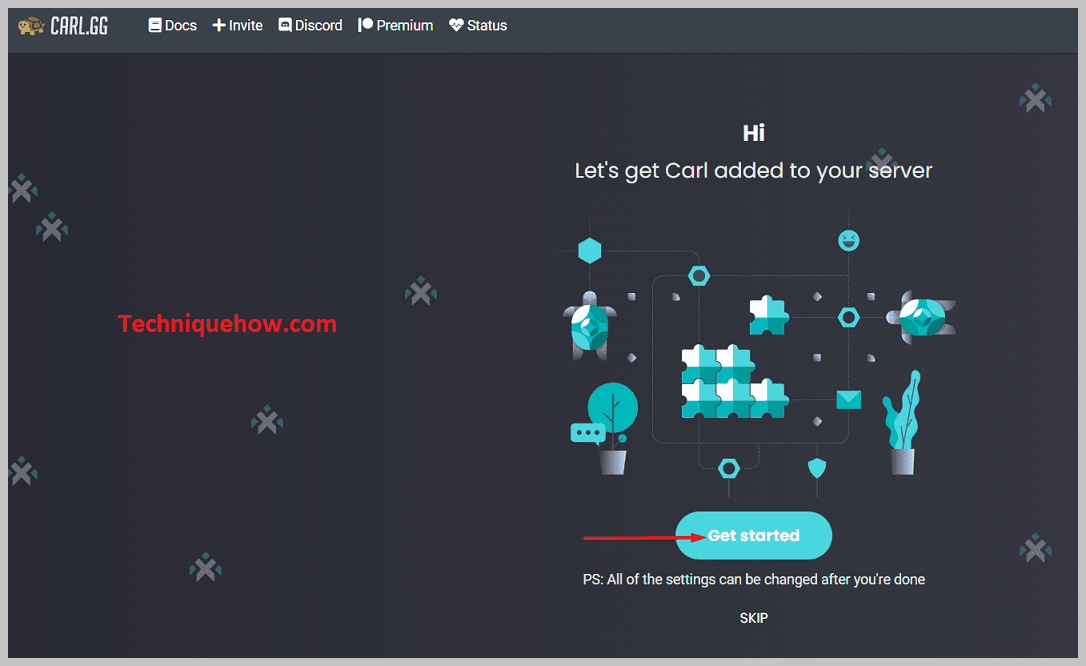
Step 8: You’ve successfully invited Carl Bot to be on your Discord server.
