✎ Key Takes:
» You can enable recording on Google Meet from G Suite by visiting “admin.google.com,” navigating to “Apps,” and ensuring Google Meet is set to “ON for everyone” under G Suite settings.
» Make sure that the recording option is activated by clicking on the three dots icon, selecting “Recording” in service status, and allowing meeting recording in the Edit option.
» If the record button is not visible on Google Meet, start a meeting on “meet.google.com,” join using your G Suite account, click on the three dots icon, and select “Start recording.” Ensure consent is provided, stop recording using the same menu, and find the recording in “drive.google.com” under “My Drive” after logging in with your G Suite account.
Contents
How To Enable Recording In Google Meet:
Follow the steps below:
🔴 Steps To Follow:
Step 1: The first step you have to follow is to go to your web browser from your PC, and in the search bar, you have to type in “admin.google.com”; and press the Enter key.
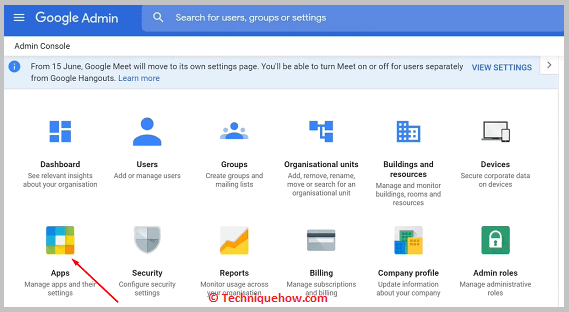
Step 2: As a result, a new page will open, and you will be on the Google Admin page. You will find a range of icons on this page, such as “Dashboard”, “Devices”, etc. The icon right below the first option, the “Dashboard” option, will be “Apps”. You will have to click on this option.
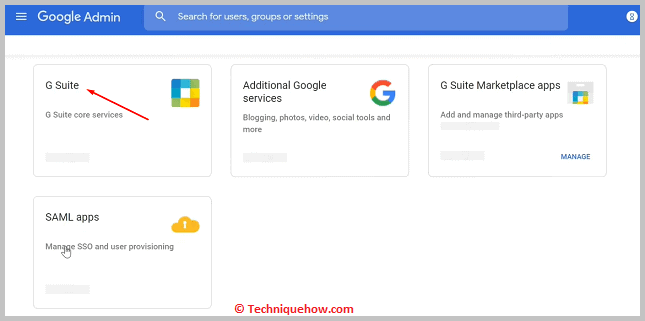
Step 3: You will now be in the “Apps” section of the Google Admin page. Here, you will notice, again, a list of icons. Click on the first one that says “G Suite”.
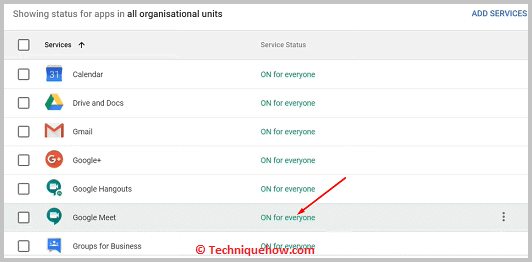
Step 4: You will now find a list of all the services provided by Google that you use. You will have to look for the option “Google Meet” over here. There will be an option beside it that will tell you the “Service Status”.
The service status will either be turned on or off. If it is turned off, you must turn it on by clicking on the three dots icon to the right. Under the three dots icon, you will get the option “Turn ON for everyone”. You have to click on this to turn on the service status.
Step 5: The service status will now show “ON for everyone”. You have to click on this text.
Step 6: In the next tab that appears, you will notice a section of options with the heading “Media video settings”. Under this, you will find an option that says “Recording”. Click on it.
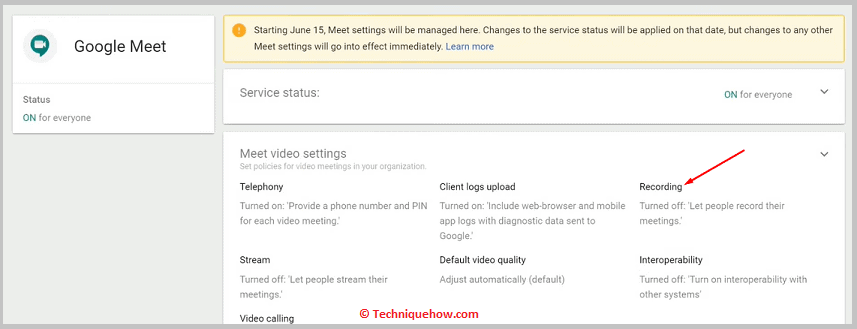
Step 7: Next, scroll down until you find the “Recording” setting beside which the text will say “OFF”. Then, click on the edit option to the right and select the option “Let people record the meetings”.

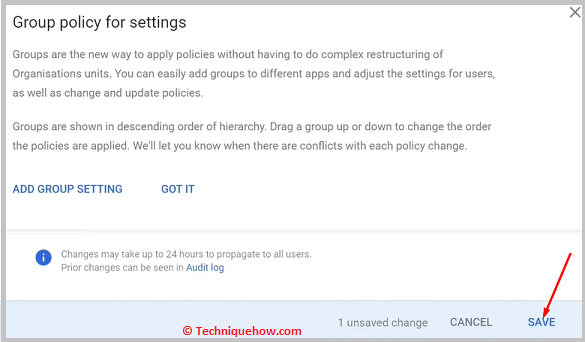
Step 8: Then click on “SAVE”. You will now be able to record your Google Meet meetings.
How To Record a Meeting In Google Meet:
You can try the following steps below to record a meeting in Google Meet:
Step 1: Start a Google Meeting & Share Link
The first step you have to follow to record a meeting in Google Meet is to open a web browser on your PC and type in “meet.google.com”. This will open the Google Meet home page. Here you will find a few options on the top right corner of the screen. The right-most option will be “Start a meeting”.
You have to click on this. Next, you will be taken to the “Sign in” page, where you can type in your email and password and log in to your Google account. In the email section, type in your G Suite account email.
You can also create a new account here. After that’s done, you will be taken to the Google Meet meeting page, where meetings are conducted as the name suggests. Next, you have to click on “Join now”. A notification will appear asking you to add others by sharing the joining code. Share this with people using any mode of communication that you prefer.
Step 2: Click Record Meeting
Once the meeting has started, you will notice a bunch of icons at the bottom right corner of the screen. The icon to the complete right, however, is that which resembles three dots. This is called the three dots icon.
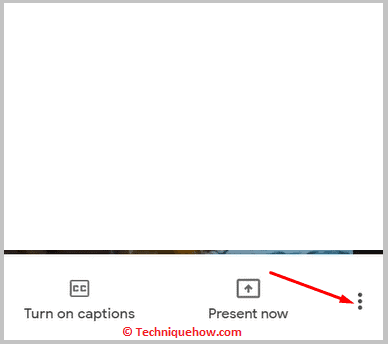
You have to click on it. A list of options will appear above the icon related to changes you can make within the current meeting. Here you will find an option that says “Record meeting”. You will find this as the first option in the list. You have to click on this and provide consent; the meeting will start being recorded.
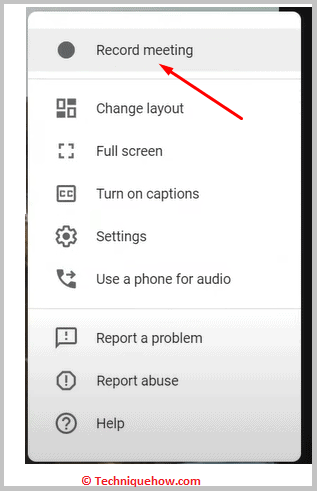
Note: For a meeting to be recorded by its participants, you must grant related permissions in G Suite.
Step 3: To End: Click Stop recording
You’ll know your meeting is being recorded by the red button that says “REC”. After recording the meeting and would like to stop, you have to go to the three dots icon at the bottom of the screen.

You will then have to click on it. A list of options will appear, and the top option here will be the one we require right now. The option is called “Stop recording”. You have to click on this to stop recording the meeting.
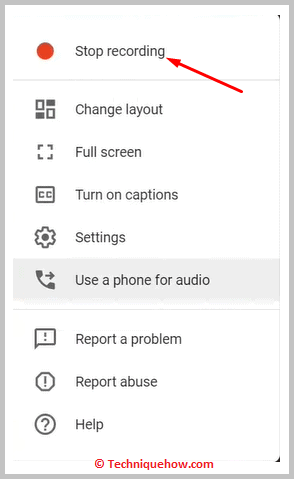
You will get a verification prompt asking if you wish to stop. Click “Stop recording”. After you click on the option, the red button that says “REC” will be removed after a second or two, depending on the strength of the internet.
Step 4: Saved to Google Drive Automatically
As soon as you stop recording the meeting by clicking on the respective option and confirming the same in the verification prompt, your video will be saved to Google Drive. You can know this for sure as a text appears at the bottom left corner of the screen for a short period suggesting that the video you recorded has been saved to your Google Drive directly. Therefore, no manual saving of the file is required in this case.
Step 5: Find the Recorded Call from Google Drive
To find a recorded call, open a new tab on your browser and type “drive.google.com” in the search bar. Your Google Drive area will open. Make sure you log in with the same account you used to record the meeting.
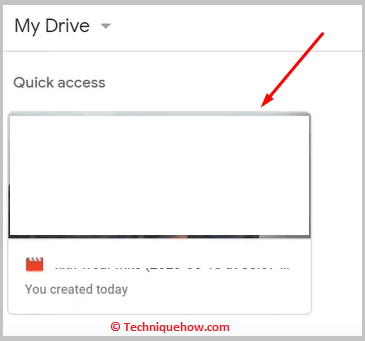
Here, you will have to search for the recording that just got saved. You will find the same in the “My Drive” section, which you can visit by clicking on the “My Drive” option to the left of the screen. Then, you can watch this video or even download it.
Google Classroom Recording:
You can record a Google Classroom on Google Meet. However, this can only happen if the related permissions have been granted in G Suite.
This means that an individual has to go to their Google admin account and the Google Suite area and allow permission for people to record the meeting. Then the “Record meeting” option will appear in the meeting’s three dots icon area.
