✎ Key Takes:
» You can recover permanently deleted Facebook messages by unarchiving chats, accessing email notifications, or downloading your Facebook information from Settings and Privacy.
» You can review messages from your email or using the download Facebook information option can help restore deleted messages efficiently.
Contents
How To Recover Permanently Deleted Messenger Messages:
Just follow the below-mentioned methods in order to recover the deleted messages on Facebook:
1. From Archived Chat
An effective method to recover missing Facebook chats is to recover the messages from the archived chat section. The chats that you’ve archived instead of deleting can be recovered.
The steps below will let you know how to find the Archived chats section to unarchive the missing chats:
🔴 Steps To Follow:
Step 1: Log in to your Facebook account using your phone.
Step 2: On the top right section of the screen, click on the Messenger icon.
Step 3: Immediately you’ll be directed to the Messenger application. Make sure that you’re logged into Messenger.

Step 4: On the top left section of the application, it will show your profile picture. You’ve to click on it to proceed.

Step 5: Next, you’ll have to click on the Archived chats option.
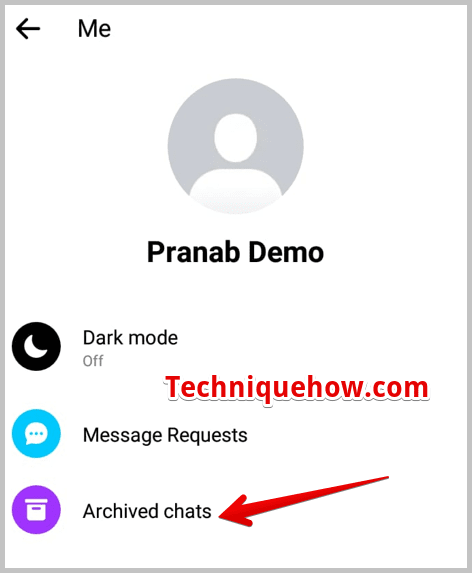
Step 6: Now you’ll be taken to the section where all the chats that you’ve archived earlier are displayed. Scroll down to get your desired chat.
Step 7: You can tap and hold that chat for two seconds. Your screen will prompt you with a few options.
Step 8: Click on the first option Unarchive to bring the chat to the main inbox and it’s restored.
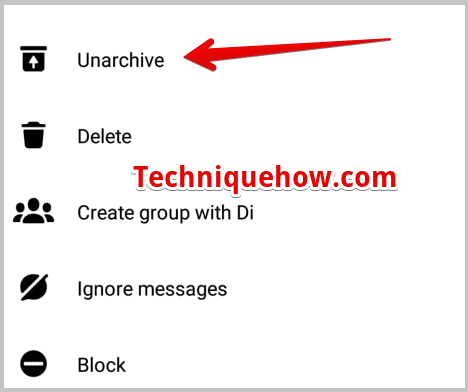
To get the chat unarchived or get back the chat to the main inbox, you can directly send a new message to that person. It will automatically unarchive the chat and you’ll be able to recover it.
2. Check from Emails
If you’ve enabled your email notification from chats you’ll be able to receive mail notifications for incoming messages on Facebook when you’re offline. Therefore if the message notifications are sent to your registered email, you’ll be able to check your emails to view replies from the sender.
If you can’t find a chat on Facebook as it has been deleted somehow, you can also check your email to view the reply from the sender.
Facebook provides the option to get email notifications of messages on your registered email address when you receive any from your Facebook friend. The email will show you the replies or the messages of the sender, therefore even if you can’t find the chat, you’ll be able to see a few replies in the mailbox to view the messages he or she has sent you.

However, you’ll only receive email notifications if you’ve enabled the notifications to be sent via email in the first place from the Settings and Privacy section. Even if you’ve enabled the email notification but have turned off the notification from a particular chat, you won’t receive any email notification for that chat.
A notification email doesn’t show you the entire chat but just the replies of the sender. Therefore you’ll be able to check the messages sent by the sender even though you’ve deleted the conversation.
3. Download your Facebook Information
Here’s another effective technique to get back all your deleted messages. For that, you’ve to download a copy of your Facebook information.
After deleting any messages or chats, they are stored in the settings. Therefore by downloading a copy of your Facebook information, you can restore your deleted messages.
To do that, you’ve to act according to the following steps that will help you to download a copy of your information to extract the messages from it.
🔴 Steps To Follow:
Step 1: For the first step, log in to your Facebook account and then head on to click the Settings & Privacy option.
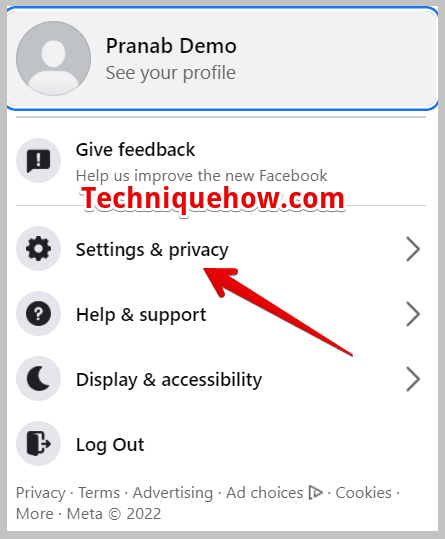
Step 2: Next under the General Account Settings, click on the Your Facebook Information option.

Step 3: Then on the right section of the screen, click on the Download your information option to proceed.
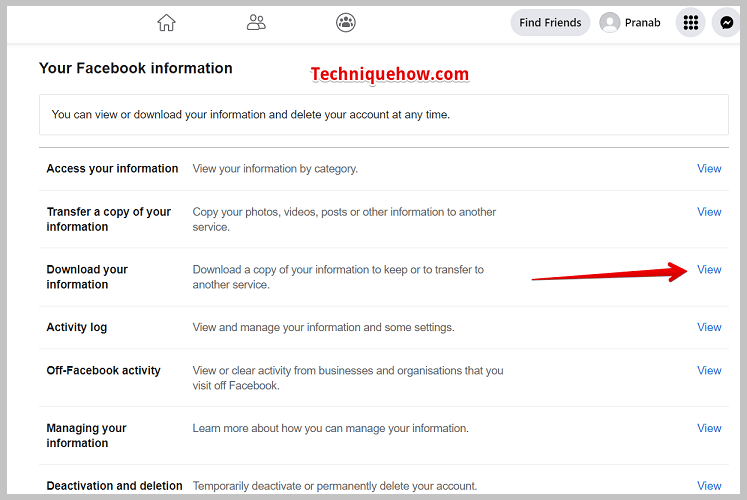
Step 4: It will further redirect you to the next page, where you’ll be able to download all your account information and activities.
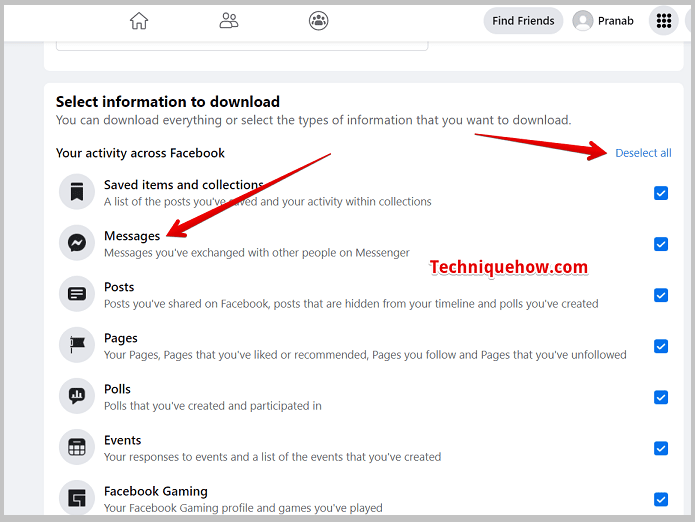
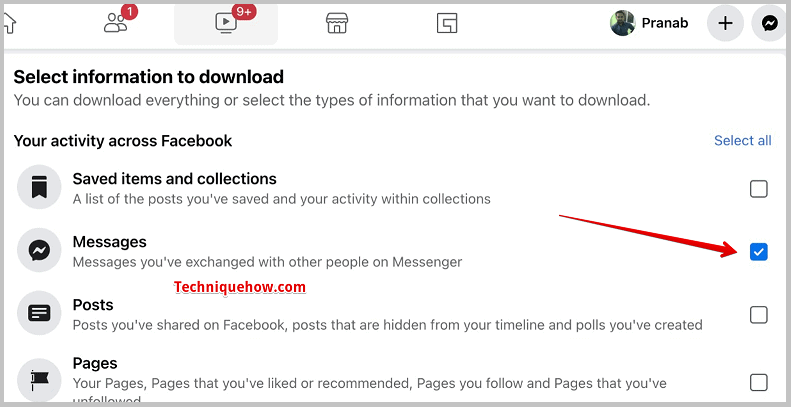
Step 5: You can click on Deselect All and then checkmark the option Messages to select and optimize the data you want to download.
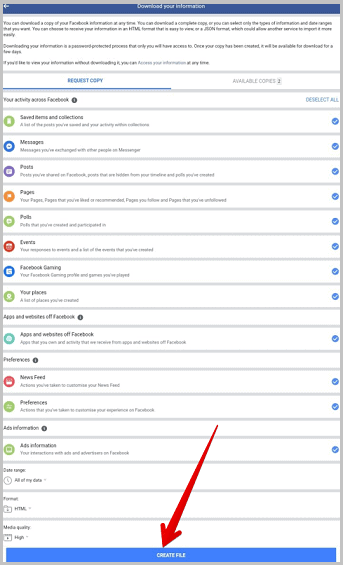
Step 6: Next, you need to click on the blue Create File button. (You may not see the option, so switch to mobile for downloading the data).
Step 7: As it starts to download, a popup notification will inform you about the same. After the completion of downloading the data, Facebook will notify you.
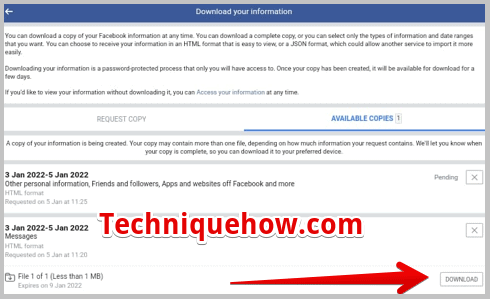
Step 8: Check your registered email address for a mail from Facebook, which would contain a link attached to it.
Step 9: Click on the link. It will redirect you to the Facebook download page, where you need to enter your Facebook password.
Step 10: You’ll be able to see the file there. Click on the Download option next to it.
Step 11: Next, Unzip the folder and then look for the ‘Index file‘ to extract the deleted messages.
Step 12: Choose and click on the option Messages to see all your deleted messages.
