✎ Key Takes:
» You can find red underlines on your phone when typing in languages other than English, due to spell-checking features.
» Also, use the keyboard settings to turn off auto-suggestions and auto spell-checking, ensuring your text meets the spell-checking criteria.
To disable the red wavy underlines on your computer,
Step 1: First of all, go to File >> Options.
Step 2: From there select the ‘Poofing’ option and untick the spell-checking and grammar-checking features.
Step 3: Now, click on the ‘OK‘ button to save the settings, and the underlines with be gone away.

Contents
What Do the Red underlines Mean:
While typing a document on Word, you can find some words underlined with wavy red lines. Many people become confused – about what this red color underline means.
They start to think that due to these red underlines, the document seems messy, so they wonder how to remove the underlines from the document. Read through the article and learn how to get rid of red lines from various devices.
You can remove these colored underlines from various devices like iPhone, Android, Mac, and from your desktop. Just follow the instructions and you will get the results.
How To Remove Red Lines In Word In Phone:
iPhone has a special feature of underlining a word with a red color that is not present in the dictionary. The feature proves to be beneficial, but sometimes it becomes irritating. Now, you want to get rid of this feature, so go with the steps that help to remove the red underline. It’s easy to track your iPhone’s spell-checking feature by abiding by the points.
To turn off the settings to disable the red underline on your iPhone:
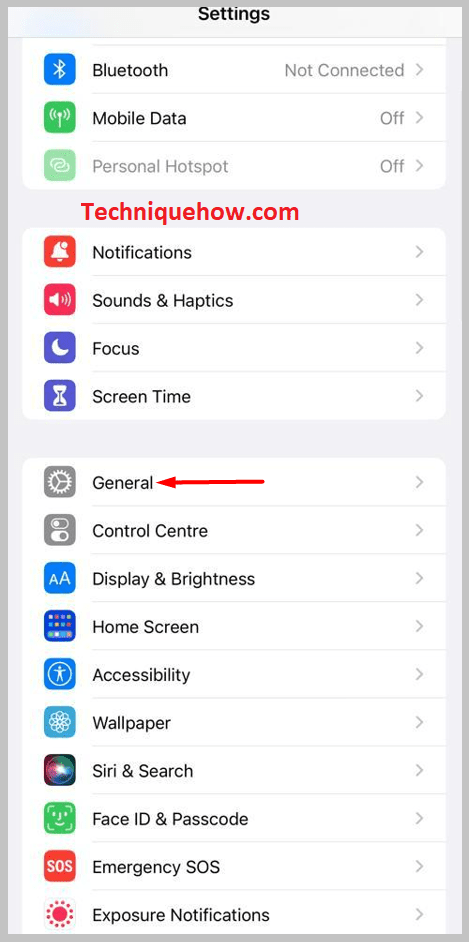
Step 1: First of all, click on the ‘Settings‘ section then click on the ‘General‘ option.
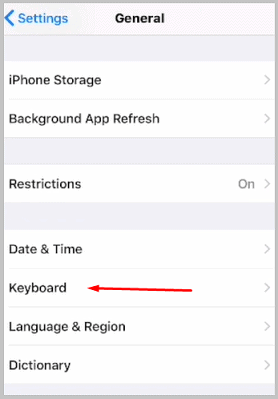
Step 2: Then, select the ‘Keyboard‘ section to see the settings of the keyboard.
Step 3: Under the Keyboard section, look for the ‘Auto-correction‘ option.
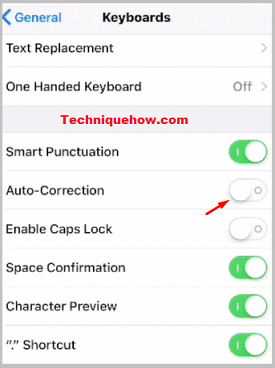
Then just turn off the option by swiping to the left.
Now, your iPhone will not underline any word, as the words are added to its dictionary.
How to Remove the Red Line in Word:
In Android also and if typing red underline comes then it becomes frustrating. Want to remove these irritating red lines?
Follow these below steps to get rid of the red lines on your Android while typing:
Step 1: Firstly, head towards the section of the Android settings.

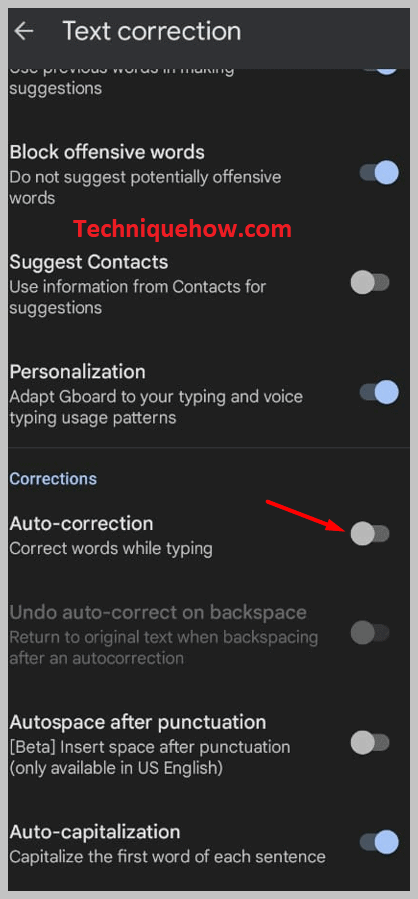
Step 2: Under the settings bar, click Language and keyboard on Gboard.
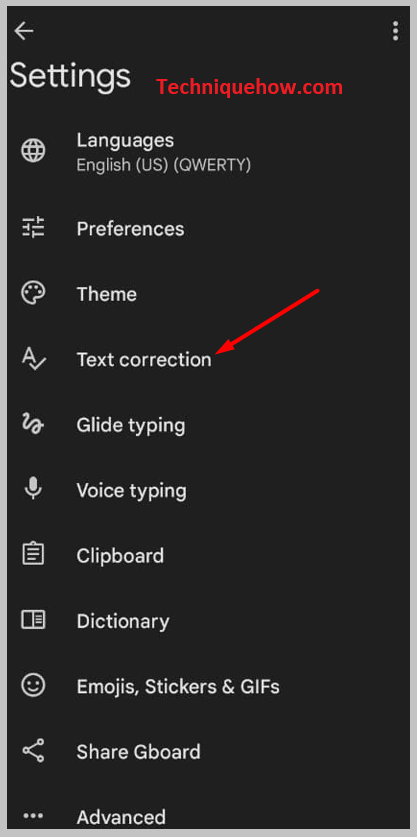
Step 3: Then, tap on the spell correction option under this section.
Step 4: Finally, turn the spell Auto-correction option off.
How To Remove Red Lines In Word Mac:
There are two methods for this.
1. From Macbook Settings
To remove the red underline in Word on your Mac:
Step 1: Open the Word document, and select the ‘Preferences’ option on the Word document.
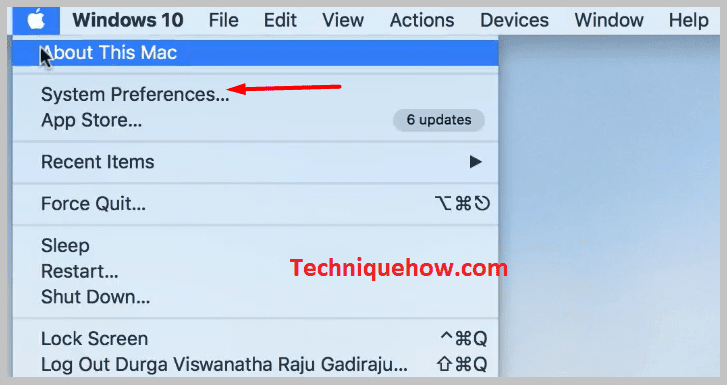
Step 2: Tap on the ‘Keyboard‘ icon under the ‘Preferences’ option.
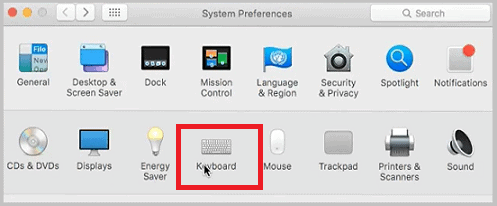
Step 3: In the grammar section, disable checking grammar during typing. Just untick the ‘Correct spelling automatically‘ option on your Mac.

Once the changes, all red lines under the words of your document will go away and your document will look great.
