✎ Key Points:
» You can view your iPhone location history by navigating to Settings, selecting Privacy, and accessing Location Services. Once there, tap on System Services and choose Significant Locations, where you’ll find a record of your past locations.
» You can use Face ID for authentication; ensure it matches to access the detailed location history. If faced with privacy concerns, use the Clear History option to erase the records and maintain confidentiality.
Contents
How to View iPhone Location History:
You can try the following methods below to view iPhone location history:
1. Find Significant Location History
Take the following steps below:
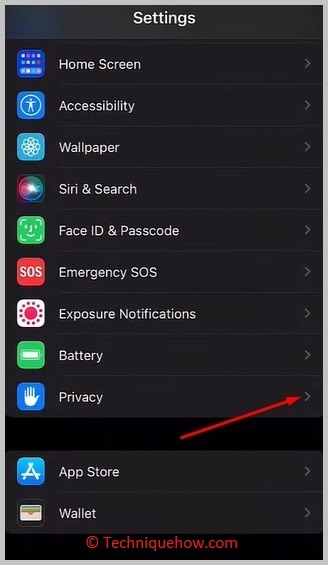
Step 1: Open Settings app > Privacy
If you want to know where you’ve gone recently, you can see the location history and even clear it if needed.
Here in the steps, you’ll get to know how you can view the iPhone location history. To start with you need to open the Settings app of your iPhone from the homepage.
Next, you’ll be displayed in the Settings list. You need to scroll down the list and then click on the Privacy option. The Privacy option is located under the Battery option and above the App Store option in the Settings list.
Step 2: Tap on Location Services
After clicking on Privacy, you’ll be taken to the Privacy page. On the page, you’ll be able to see a long list of options. You need to click on the first option i.e. Location Services. You’ll be taken to the Location Services page.
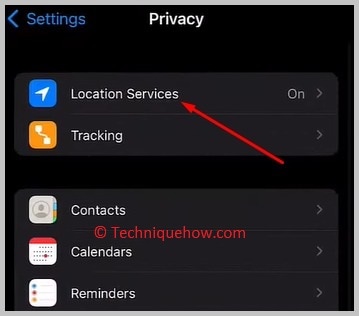
You need to make sure that the Location Services of your device are kept on or else you won’t be able to perform this method correctly. If it’s already turned on, the location switch will be displayed in green.
Only if your GPS location service is kept on, your iPhone will be able to track your location and keep a record of the places you’ve been or visited. You don’t need to worry about your privacy as Apple assures you to keep it safe and secure.
Step 3: Scroll Down to ‘System Services’ and tap on it
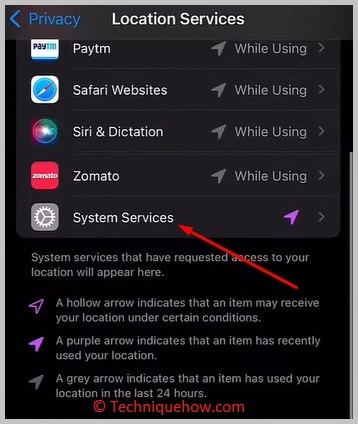
After making sure that the Location Services is kept on, you’ll need to scroll down the page through the list of options to find System Services. It will be at the bottom of the list. You need to click on the System Services option. It will immediately be taken to the System Services page.
You may not know but these location services play a vital role in helping to rescue people when in danger. It’s a personal safety service that can sometimes also help in solving legal matters. Almost all technical companies offer location tracking services as it ensure the safety of the user as well as the device.
Step 4: Tap on ‘Significant Locations’ & See All Locations
After clicking on the System Services option, you’ll be taken to the next page. You need to scroll down the list of options on the System Services to find and click on the Significant Locations option. It will try to scan the Face ID for two seconds. Only if the Face ID matches, you’ll be taken to the next page.
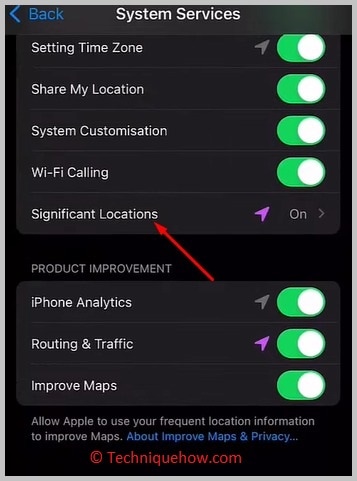
If the Face ID doesn’t match, you won’t be able to enter the Significant Locations page as the owner of the device can only access it. As the Significant Locations page contains sensitive information, it is protected by a Face ID lock.
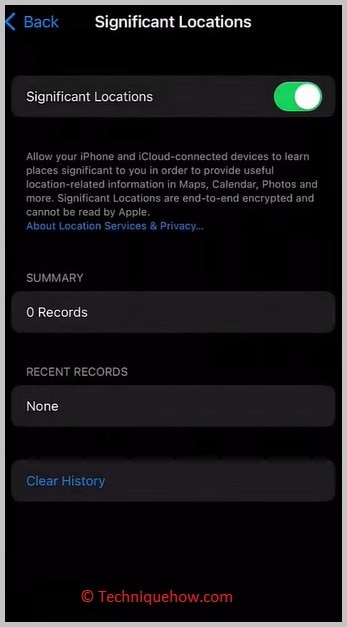
On the Significant Locations page, you’ll be able to see all the locations under Recent Records and Summary. If you want to delete the record of the past place you need to click on the blue Clear History option at the end of the page to erase the location records.
2. From Find My App on iPhone
Follow the below steps:
Step 1: Open Find My App
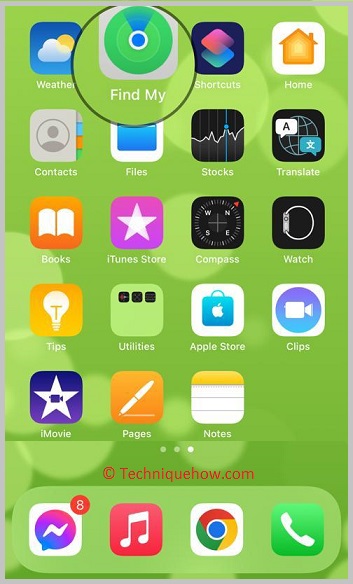
You can use the Find My app to share your location with others. When you sign in to your iCloud app, your Find My app gets connected and turns on automatically. You need to open the My Find app on your iPhone from which you want to share your location with others.
Step 2: Tap on People > Start Sharing Location
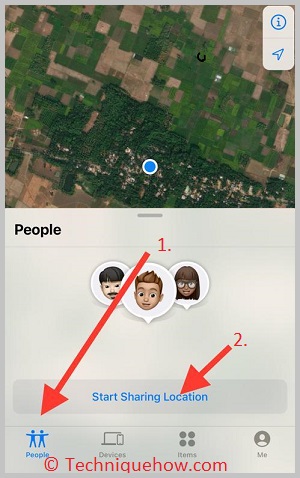
Next, you’ll be able to see the People option at the bottom left. You need to click on People and then you’ll be able to see the location of people who are sharing their location with you. If no one is sharing their location with you, then the list would be empty. To share your location, you need to click on the Start Sharing Location button in blue at the bottom of the screen.
Step 3: People Can Check Location
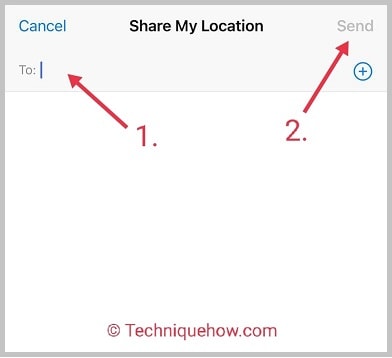
After clicking on the Start Sharing Location button, you’ll be taken to the next page where you need to choose the contact with whom you want to share your location. You can type the name on the search bar and then from the results, click on the name.
Next, click on Send. Choose the duration of the sharing location and it will be sent. Now the person to whom you’re sending your location can see where you go.
