✎ Key Points:
» You can initiate video call recording on MacBook by starting a Messenger call, then simply press command+shift+5 to select the screen area and tap Record, seen within the Messenger interface.
» Try using WonderShare DemoCreator for a seamless recording experience on MacBook. Just open DemoCreator after starting a Messenger call, enable audio and screen settings, ensuring a hassle-free recording process.
» If you encounter video call recording challenges on iPhone, utilize the built-in Recording feature for Messenger calls to effortlessly capture your conversations, ensuring a smooth and integrated solution.
Contents
How To Record Video Calls on Messenger:
Follow the different steps for devices:
Follow the steps for DemoCreator:
Step 1: Install the WonderShare DemoCreator
Open your Google Chrome Browser and search for WonderShare DemoCreator. Then, go to the official website of the WonderShare DemoCreator at the middle of the screen, and you can see the FREE DOWNLOAD option; click on it, and your download will be started.
After completing the downloading, Install the WonderShare DemoCreator application.
Step 2: Start Messenger call
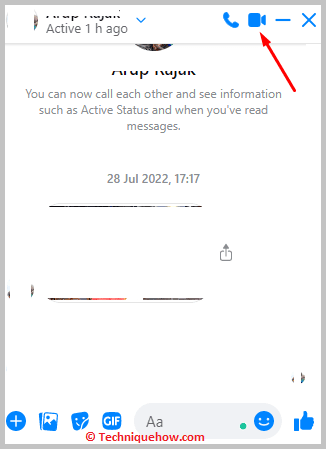
After completing the installation of WonderShare DemoCreator, open the Messenger App and log in to your account with your credentials. Now find out the person whom you want to video call, open his ProfileProfile and click on the video call option from the top right corner and wait for some time for the person to accept the video call.
Step 3: Start the WonderShare DemoCreator
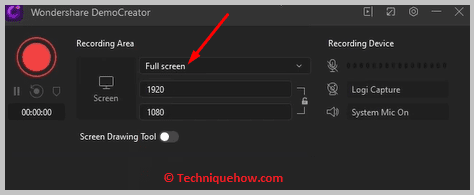
When the next person accepts your video call, open the WonderShare DemoCreator application and set the screen to the Messenger video call. A pop-up will appear on your screen where you have to set up the WonderShare DemoCreator to do the recording properly.
Step 4: Enable audio, select the area to record
In the pop-up menu, click on the Downward button and select the type of screen from there. Next, click on the Settings icon from the upper right side of the pop-up, and a new pop-up will appear where from the Screen section, you can change the Screen Capture and the Frame Rate (you can make it the possible max fps to get the smooth video).
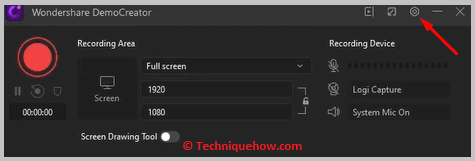
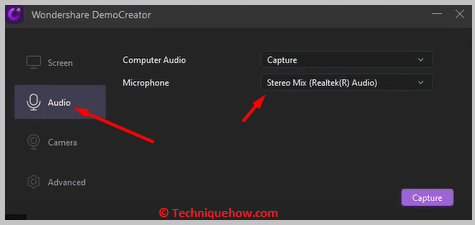
Next, click on the Audio option, and you will get two options: Computer Audio and Microphone Audio. By default, Computer Audio is set as capture, and Microphone Audio is set as Don’t Capture. Change the Microphone Audio Settings to Capture; otherwise, only the device voice will be recorded, and your voice will not be recorded.
Step 5: Start Recording
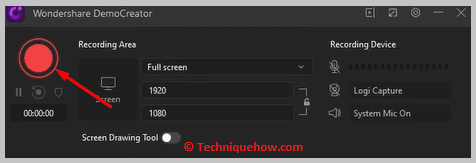
After setting up everything, tap on the New Recording option (Big Red Circle button) on WonderShare DemoCreator. Then start the recording and after completing the recording, stop it by clicking on the Big Red Square button.
2. Using Macbook’s Recording Tool
Follow the below steps:
Step 1: Start Messenger Call
Open the Messenger App and log in with your Email/ Phone number and Password. After opening the Messenger app, you will be automatically redirected to your account if you have already logged in.
If you do not have the application, open your Google Play Store (for Android) or App Store (for iPhone) and install the app. After that, tap on the person’s Profile and open the chats with whom you want to video call. Then, tap on the video call option from the top right corner.

Step 2: Tap command+shift+5
After starting the video call on Messenger, you have to enable the inbuilt screen recording feature of the MacBook. So click the ‘command, shift, and 5’ buttons together from the laptop keyboard (i.e. command+shift+5).
Step 3: Select Screen area
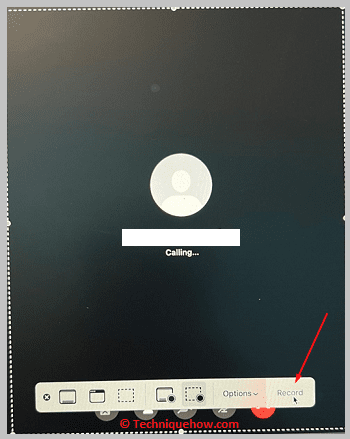
After that, a pop-up bar will appear at the bottom containing some options. Several screen sizes will appear there, and you have to choose one of the screen sizes in which you want to record your screen.
Step 4: Start Recording
You can see the Record option on the right-most side of the pop-up bar; after starting the Messenger video call and selecting the screen area, tap on that option to start recording.
Step 5: Click Stop Recording and save the file
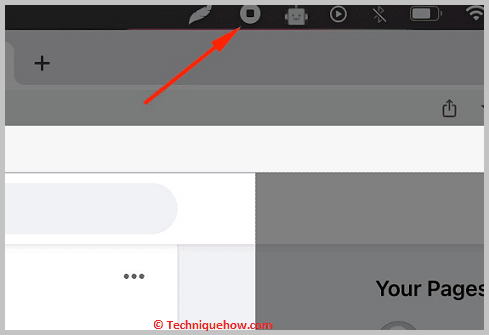
When you are done with your video call, tap on the Done button in the Menu bar to finish the recording or select the Command, Control, and Esc buttons together (i.e. Command+Control+Esc) to finish the recording. Save your file if it prompts; otherwise, it will be saved on your device.
3. By iPhone’s Recording Option
iPhone devices on the market have the inbuilt Screenshot and Screen Record feature; you don’t need to install any app from the App Store. So, to record Messenger video calls on your iPhone, you may use this inbuilt recording feature instead of installing any new app.
🔴 Steps To Follow:
Step 1: Connect your headphones to your iPhone device to avoid the outside noise and to get a clear recording.
Step 2: Open the Messenger App and log in to your account with your credentials; now, find the person from the list you want to video call and tap on his ProfileProfile.
Step 3: After opening his ProfileProfile, click on the Video call option from the top right next to the Audio call option, and the video call will be started.
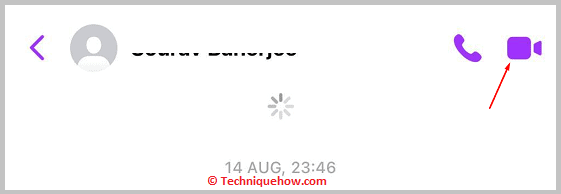
Step 4: Wait for some time for the person to accept the video call and then swipe down from the top of the screen.
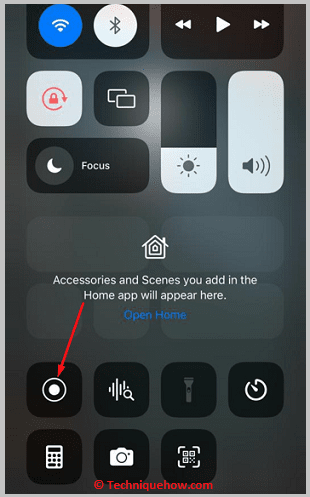
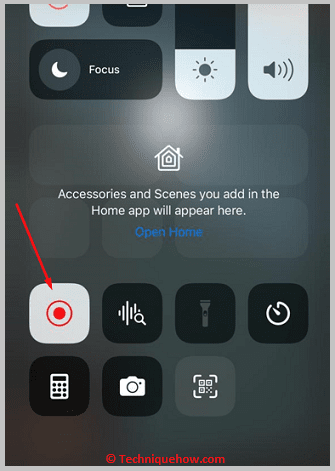
Step 5: The iPhone menu will appear there, and you can use the inbuilt Recording option from the Menu bar. Click on the Record icon, and after completing the recording, save it. You can edit and customize the recorded file in the future.
