✎ Key Points:
» You can identify the issue of an Instagram Business Account being unable to go private if the option to set the account to private is not available in the settings.
» Try using the steps mentioned above to navigate to the account settings, locate the “Switch account type” option, and select “Switch to a personal account” to resolve the problem.
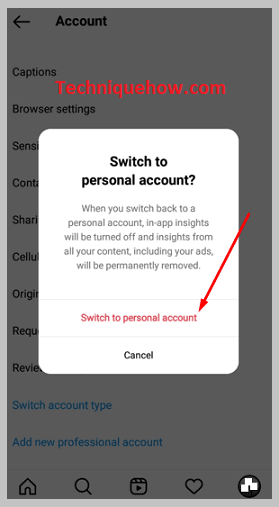
» If you encounter a pop-up asking for confirmation, proceed by confirming your choice to switch to a personal account, ensuring the account can be set to private thereafter.

Contents
Why can’t the business accounts be private:
There are many reasons for why such issue is normally shown to Instagram users:
1. You won’t get the option
Instagram business accounts were launched for a reason. An Instagram business account includes advanced features designed to help you understand your customers and bring people to your website. In particular, Instagram is an excellent platform for visually appealing brands and products.
Still, the business accounts cannot be made private because, firstly, when creating a business account, the option to make it into a private account is never shown. The app algorithm perceives it as if you are using the account for business purposes and not personal use. You would want your business far and wide, so there would be no reason for you to have your business account private.
2. Instagram privacy rules
Secondly, having a private account for business work creates restrictions, or more followers begin to flow when the information is put in. The Instagram privacy policies state, “We don’t sell any of your information to anyone, and we never will.
We also impose strict restrictions on how our partners can use and disclose the data we provide. Here are the third parties we share information with: Partners who use our analytics services.”
How to Fix ‘Instagram Business Accounts Can’t Be Private’ Issue:
The business accounts can’t be private, but account types could be changed from “Business” to “Personal” by following the steps mentioned below:
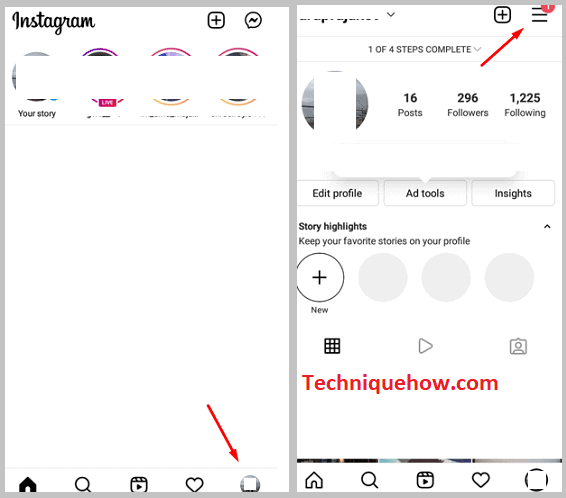
Step 1: Open Instagram & Tap Three-Lines icon
Now open your Instagram app on your device, and then you need to go to your profile by tapping on the profile photo in the corner of the page. Once you arrive there, you need to look for the icon with three horizontal lines on the top of the page in the right-hand corner. Tap on that icon.
Step 2: Tap on the Settings gear icon
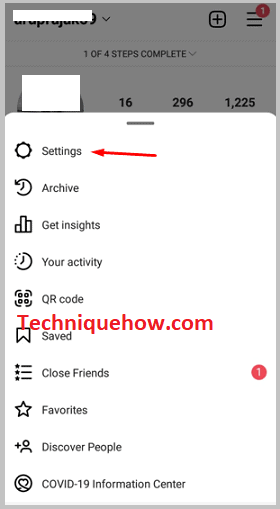
Once you reach the profile page and tap on that horizontal icon at the top of the page, a panel slides from the bottom of your page. Eight options are visible settings, archive, your activity, QR code, saved, close friends, and favorites, etc. Now tap on the option reading “Settings.” It will be on the top of the options list (meaning the first option).
Step 3: Tap on ‘Account’
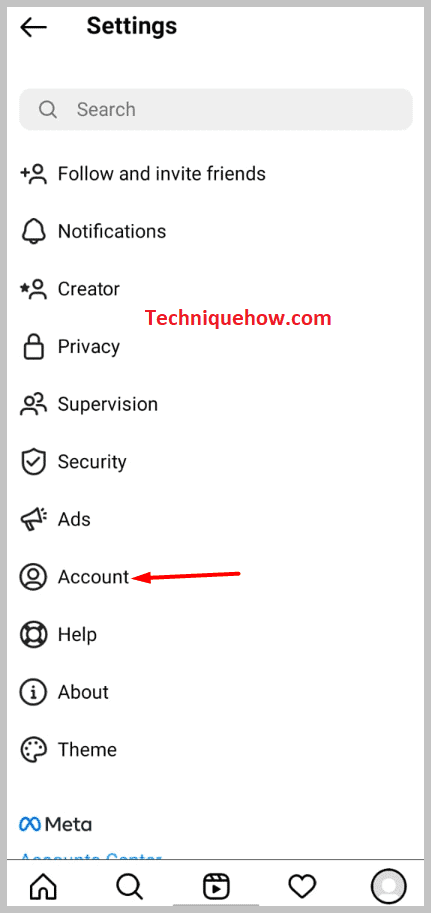
Once you have found that icon, you tap on it, and it opens a series of more options like notifications, privacy, security, ads, help, about, account, and theme. Now choose the option reading ”Account”. It will be the sixth number in the series.
Step 4: Switch account type
After you open the account folder, the options shown to you are:
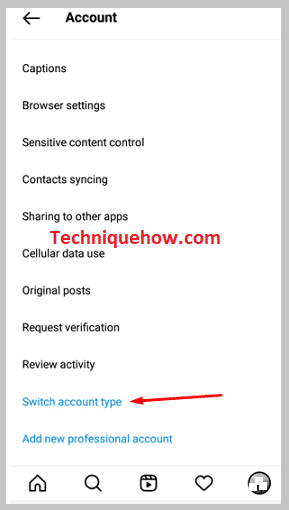
Now scroll down to the absolute bottom of the page, and you have to tap on “switch account type.”
Step 5: Tap on ‘Switch to a personal account’
After scrolling down and choosing the “Switch account type” option, you get another slide swiping from below asking whether to switch to a personal account or the option below saying switch to the creator account below it. You then choose the “switch to a personal account.”
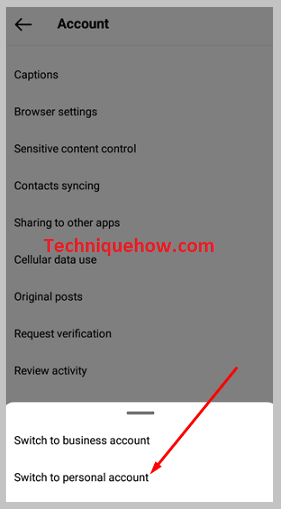
Step 6: Tap on ‘Switch to Private’
After you press “Switch to a personal account,” you get another box appearing on our screen asking for confirmation saying, “Do you want to shift to a personal account?” All you have to now do is press confirmation to continue, and then your account is now changed to a personal account. This change might take time, and exiting the app might cause disruption, so wait patiently while the account is turned from business to personal. Low connections might also cause delay, but it is nothing to worry about. Just wait for the network stability to regain and then return to the app and try again.
