✎ Key Takes:
» You can notice lower Macbook camera quality in low-light conditions during activities like video calls or late-night shooting.
» Start using an external camera, such as your iPhone, for critical conferences or recording sessions, but for a simpler solution, consider installing software that allows adjustments to camera brightness and light, enabling quality shooting or streaming even in dark environments.
Contents
How To Fix Macbook Air Camera Quality:
If you want to improve camera quality you can do this from two different methods, one is using the Logitech webcam hardware tool and the other way is by using the software tools:
1. Using Tool: iGlasses
Some tools make a huge adjustment to your webcam by enhancing the brightness and many other controls over the video control panel and improving the video quality.
You can use either the Ecamm iGlasses tool or the ManyCam for your purpose and these tools can easily fix the video quality issue just by making some changes to your MacBook.
iGlasses is a third-party tool that you can install on your MacBook to control the camera settings and improve video quality.
You just need to have macOS 10.12 or newer to use this tool and purchase it at $19.95 with a lifetime license. Better you go with the free trial plan at first.
You can download and try it for free. This tool has very small resources that make it load faster and no extra huge space on your hard drive.
🔴 Steps To Follow:
Step 1: Install the Ecamm iGlasses on your MacBook.
Step 2: Open your video settings and select iGlasses for your webcam to run with.
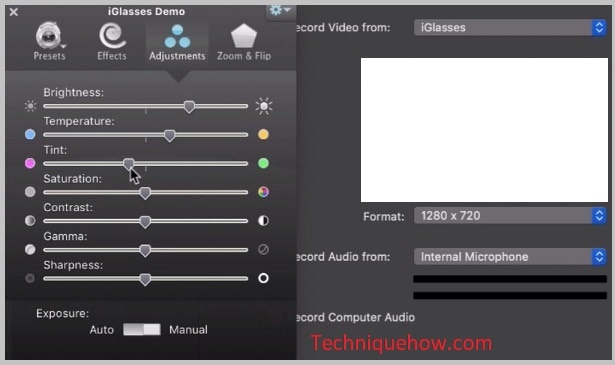
Now, you will be able to control the settings and brightness of your webcam as per your wish and all the apps will use the same settings after the setup is completed.
2. Using ManyCam for Mac
ManyCam is another efficient & useful video management tool that you can use for your MacBook to modify or fix the video quality issue on your own.
You just have to download the tool on your Mac and select the drive from your webcam.
You can start the plan from $29 per year and also use the Free trial version of this ManyCam tool. Note this tool takes up huge space on your MacBook, so make sure you have enough space present on your MacBook.
🔴 Steps To Follow:
Step 1: First of all, install the ManyCam on your MacBook, you can start with the free trial option as well.

Step 2: Once the installation is completed, just run and select the HD Pro cam from the webcam control panel and the apps will use this ManyCam as its default webcam settings.
Note: This tool provides a lot of options and you have to set the brightness & other hues there only once and the same will take effect for all video calling apps.
How To Fix Macbook Pro Camera Quality:
You can try the following methods below:
1. Use iPhone camera on Macbook
The best way to improve the total resolution on your webcam is by using an external camera. As you know, you can use any external cam on your MacBook Pro like Fujifilm, Logitech Webcam, and your iPhone device.
This guide will show you how you can connect your iPhone cam to a MacBook Pro and use it as a MacBook default webcam for all apps.
On the first setup, every time you connect this will start automatically, just from the video control panel check for the default webcam is set to EpocCam.
Let’s start the guide step-by-step:
🔴 Steps To Follow:
Step 1: First of all, go to the app store and find EpocCam there, the free version will allow recording 480p, and the premium will allow taking 1080p on webcam. Choose your option accordingly and install it on your iPhone.
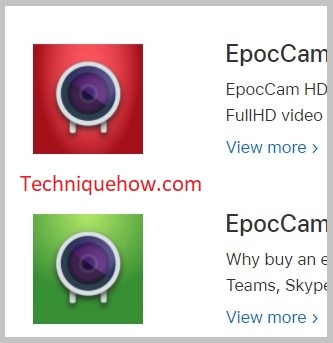
Step 2: Before you set up this for your MacBook, you need to install the driver to run EpocCam on your Mac. Just install & run this.
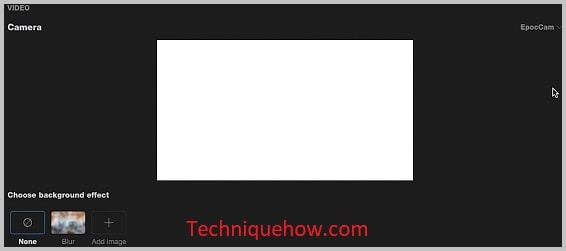
Step 3: Once the driver is installed, connect your iPhone using USB to MacBook and just check your EpocCam on your iPhone & set the resolution to 1080p.
After the driver is installed on the webcam panel you will have the option to select EpocCam and set it as the default webcam. Upon that, you are now set to the iPhone camera to use as your MacBook webcam.
2. Update macOS and Applications
Just you can use this method to update the macOS and applications to ensure compatibility and bug fixes that may affect the camera quality. Just try the following steps below:
Step 1: First, go to the Apple menu and click on “System Preferences.”
Step 2: Then, select “Software Update” and check for any available updates.
Step 3: Next, update macOS and other applications installed on your MacBook Pro.
Step 4: Now, restart your MacBook Pro and check if the camera quality has improved.
3. Reset SMC and NVRAM
You can try this method to reset the System Management Controller (SMC) and Non-Volatile Random-Access Memory (NVRAM), which can help resolve camera-related issues. Try the following steps below:
Step 1: First, shut down your MacBook Pro.
Step 2: Then, press and hold the power button for about 10 seconds.
Step 3: After that, release the power button, then turn on your MacBook Pro.
Step 4: Now, check if the camera quality has improved after the reset.
Why Does MacBook Camera Go Blurry:
These might be the reasons:
1. Check Anything That prevents Focus
When your MacBook camera is blurry you don’t need to worry or think that there is something wrong with the webcam. The webcam on MacBook becomes blurry when its focus is getting prevented by something external too. You need to check the surroundings of your MacBook and see if anything is preventing the webcam from focusing or not.
If you find it, remove the barrier so that the webcam can focus. You need to try and test the webcam on multiple apps and see if it gets better.
2. The camera is Covered By Something
There is a good chance that something is on the webcam of your MacBook that’s causing the webcam to go blurry. You may have a thin plastic sheet on the webcam which is why the camera quality has become blurry or grainy. Remove the plastic sheet that’s covering the webcam and the blurriness will go away.
However, the lens of the camera might be just dirty due to exposure to outside pollution and dust which is why it has become blurry.
3. It is Not Cleaned Up (Use a soft cloth to clean it)
If there’s dirt on the webcam, it can cause blurry pictures and videos. You need to clean it up with a soft cloth so that the blurriness goes away.
When you’re cleaning or wiping the webcam, you need to use cotton handkerchiefs and gently rub the webcam so that you’re not too harsh upon it. Once you’re done cleaning it, you need to test it on different apps that see if it’s working properly or not.
How To Improve If MacBook Camera is not Working:
You can try the following fixes:
1. Clean Up the Camera
If your webcam isn’t working you have to first try to fix it by cleaning the camera. Exposure to outside pollution and dust accumulates dust of the webcam too which needs to be wiped with a dry clean cotton cloth.
Be gentle when you’re wiping it. Once you’re done wiping and cleaning it, check if it’s working or not. If it’s still not fixed, you need to reset the camera settings to fix it.
2. Check from Camera Settings and Reset Everything
There is a good chance that you have not enabled the webcam permission from the MacBook settings which is why you’re not able to use the webcam.
🔴 Steps To Follow:
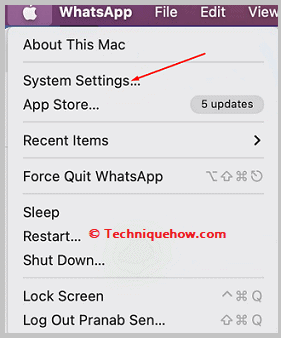
Step 1: You need to click on the Apple menu and then click on System Settings.
Step 2: Then Click on Privacy & Security.
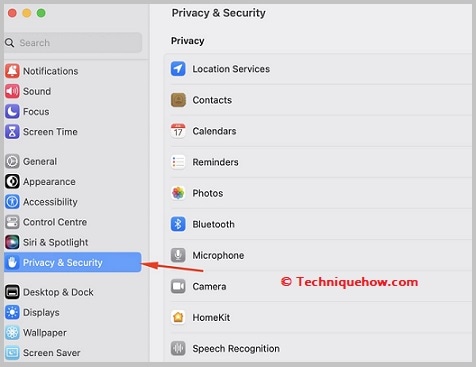
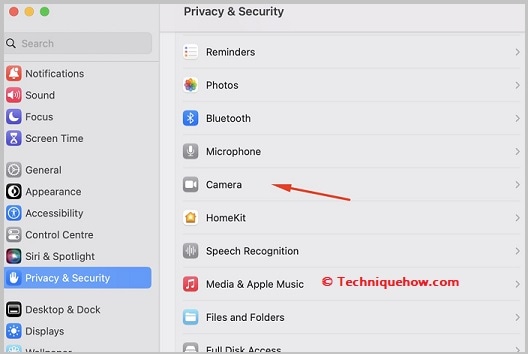
Step 3: Click on Camera and then make sure that all the apps that you want to use the webcam with have a checkmark sign next to them.
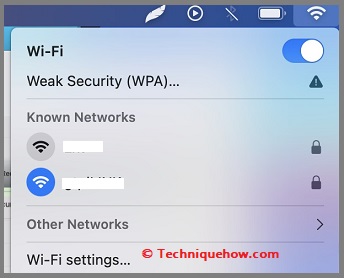
Note: You need to check if you’re connected to an internet connection. If you’re not connected to the internet, connect your MacBook to an internet connection to use the webcam. You need to close the other apps which use the webcam to use the camera on one particular app only at a time.
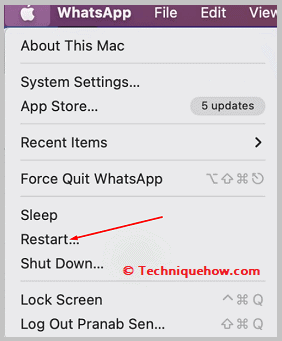
Even if you find that it isn’t fixing your webcam, you need to restart your MacBook and then the webcam might work. To restart your MacBook, click on the Apple icon from the top menu panel and then you need to click on the Restart button.
You can also reset the settings of your MacBook to fix it. The steps below will help you do so:
🔴 Steps To Follow:
Step 1: Shut down your MacBook.
Step 2: Then you need to press the power button and hold it for ten seconds.
Step 3: Release it. Wait for a few seconds and then turn on the MacBook.
Step 4: Then if the webcam isn’t working still, turn it off again and then press the right shift key, left option key, and the control key for seven seconds. These three keys need to be pressed simultaneously.
Step 5: Release them and turn on the MacBook.
Step 6: The webcam must work now.
Frequently Asked Questions:
1. Why There Is no green light on MacBook Camera:
There is no green light on your MacBook camera because it isn’t working. The green light of a MacBook is an indicator that helps the user understand that the webcam of their MacBook is on. The camera cannot be turned on without the green light as it won’t alert the user about their webcam being on.
If you’re unable to turn on the green light of your webcam on your MacBook you need to know that it’s because your camera isn’t working. You can try fixing it by turning off your MacBook at first and then turning it on again.
However, if you see the webcam isn’t working still, you need to reset the MacBook settings and see if you’ve enabled permission to use the webcam on all apps.
2. How To Find MacBook Camera Settings in Privacy?
To find the settings of a MacBook camera, you need to go to the Apple menu section, and then you’ll be able to see the System Settings option which is the section where you’ll be able to find the MacBook camera settings too. You need to click on System Settings and then click on Privacy and Security. Next, click on Camera and then enable the permission for all apps to change their settings.
3. How To Open the Camera on MacBook Air?
If you have a built-in FaceTime or FaceTime HD camera on your MacBook, you don’t have to turn on the webcam manually. But it will automatically turn on when you’ll open the app on which you’re trying to use the webcam. However before you try to use the webcam on any app, you need to make sure that you’ve enabled permission from the settings to use the webcam on the particular app.
