Your Quick Answer:
» You can unlink Facebook from Instagram by navigating to your Instagram profile, accessed through the lower right corner’s “Profile icon.”
» If you wish to unlink your Facebook account, click on the Facebook username and profile picture under the “Account Center” tab, select “Remove from Account Center,” confirm by clicking “Continue,” and finally choose “Remove” to complete the process.
How To Unlink Instagram From Facebook:
Everything has some advantages and some disadvantages as well. Linking Facebook to your Instagram lets you know, that whenever your old school friend or new office colleague joins Instagram you people can connect over on Instagram as well.
However, some people like to keep their Facebook connections, away from Instagram. Mostly, teenagers and adults Instagram and Facebook users do that to avoid sweetly annoying relatives and cousins.
Well, initially, at the time of creating an account, you would have linked your Facebook account to Instagram, in order to find your friends, but now if you want to unlink it, here are the quick and easy steps.
Steps to unlink a Facebook account from Instagram:
Step 1: Open your Instagram and Go to “Profile page”
First, run to your mobile phone and switch on your internet connection. For such settings, make sure you have a good internet connection. Now, open the Instagram app on your phone and log in to your Instagram account, from which you want to unlink your Facebook account.
Next, on the lower right corner of your Instagram home page, you will see your “profile picture” icon in a small circle. Click on it and go to your Profile page.
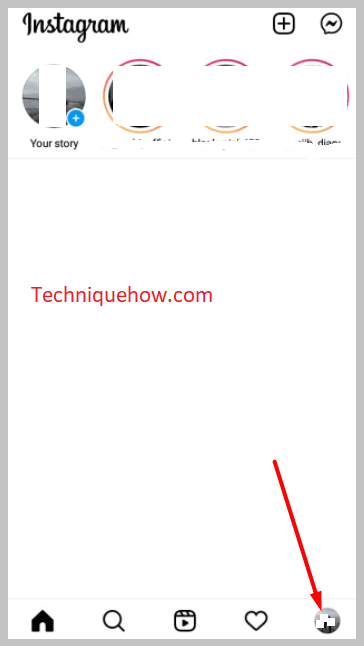
Step 2: Tap three-lines icon > Settings
Now, on the profile page, when will find all your Instagram posts and reels along with some options on the upper and lower left & right corners of the same page.
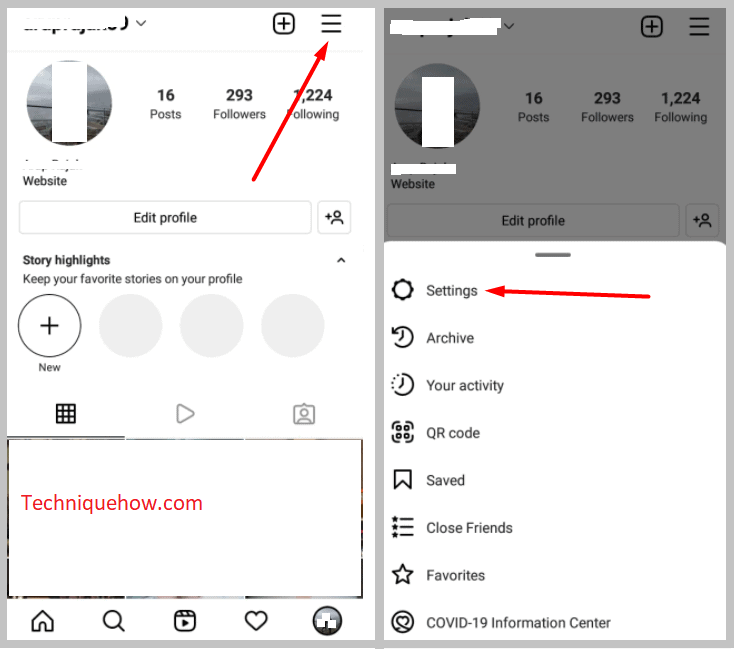
First, take yourself to the upper right corner, over there, you will see “Three horizontal lines”. Click on it and look down.
A list of options would have appeared on the screen. From that, list, find “Settings” and open it.
Step 3: Go to the ‘Accounts Center’ option
On the “settings” page you will see many options in rows, ignore all of them and carefully scroll down till the end of that page.
There you will find an option in blue > “Account Center”, just below, where ‘Meta’ is written.
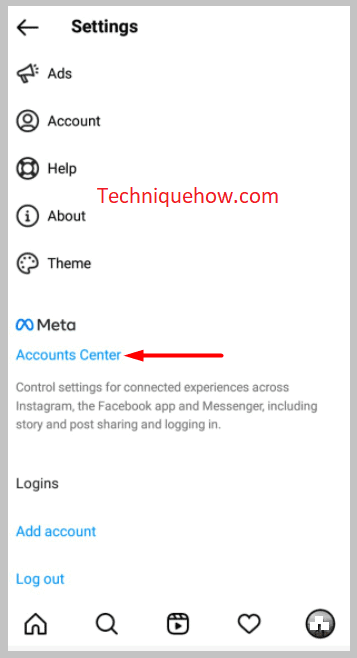
Do not get confused with the “Account” option on the page. Scroll the options on the page till last and you will see “Accounts Center” in blue. Click and open the tab.
Step 4: Find all Linked Accounts
As you land in your “Account Center” tab on Instagram, you will see all the accounts that are linked to this Instagram account.
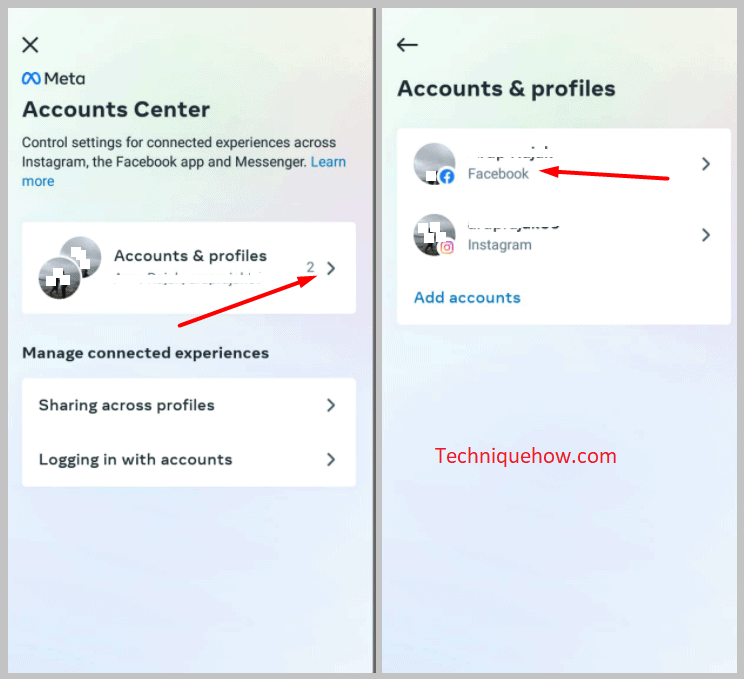
You will mainly see the Facebook account profile picture and username.
Along with Facebook, if you have linked any other social media accounts to Instagram you will also find them, in the list, here only.
Now, to unlink your Facebook account, click on your “Facebook username” and tap on “Remove from Account Centre”.
Step 5: Remove the Linked Facebook
Now, the moment you hit the “Remove from Accounts Center” option, a confirmation page will appear on the screen, in order to confirm whether you really want to remove your Facebook or have by mistake hit the button.
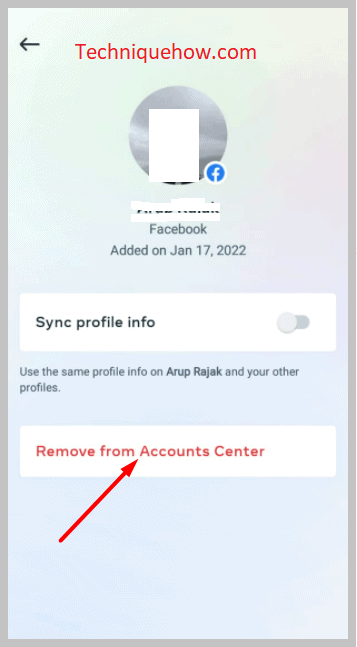
To unlink, select > “Continue” and on the next tab, you will find all the information related to the activities that will happen once you unlink the Facebook account.
Read it and click on “Remove from Accounts Center”. Now, your Facebook account is no more a part of your Instagram account.
How to Unlink Facebook from Instagram on PC:
Let us go through the steps to unlink the Facebook account from your Instagram from your PC.
Well, the steps of unlinking are more or less the same on both devices:
Step 1: Open Instagram and click on the Profile icon > Settings
On your web browser, go to the official Instagram web and log in to your account. After that, you have to go to your profile page.

For that, look at the right side of your Instagram home page screen and click on the “Profile icon”. A menu list you come up with, from the list select “Settings”.

Step 2: Click on ‘Accounts Center’ from Bottom
Now, on the right side of the screen, you will see all the information related to your Instagram account and on the left side, you will see the column full of settings options.

Move your cursor till last and click on “Account Center”, just below, ‘Meta’.
Step 3: Click on Linked Facebook Account
On the ‘Accounts Center’ section, you will get all the accounts linked to your Instagram, you can select and remove whichever account you want to remove.

Now, for Facebook, click on the “Linked Facebook Account”.
On the tab, you will see your linked Facebook account’s username and profile picture. Click on it.
Step 4: Click on ‘Remove from Accounts Center’
When you will click on your Facebook username, on the next tab you will see an option > “Remove from Account Center”. Click on it.

Instagram will display a warning and confirmation page, click ‘Continue’ and at last hit > “Remove from Accounts Center” and your account will be removed.
