✎ Key Points:
» You can create multiple YouTube channels with one email by signing in to your Google account, clicking the profile icon on YouTube, selecting Settings, and then navigating to “Account” and “Your Channel.”
» Try adding a new channel by selecting “Add or manage your channel” and then clicking “+ Create a channel.” Provide a channel name, tick the declaration, and click “Create”.
Contents
- How To Create Multiple YouTube Channels With One Email:
- How to Add other managers to your YouTube channel:
- Step 1: Open YouTube.com & Sign in
- Step 2: Click on ‘Your channel’
- Step 3: From the list, click on ‘Settings’
- Step 4: From Channel managers > Add & remove the manager
- Step 5: Manage permissions & Sign in if confirmation needed
- Step 6: Invite Users to Manage
- Step 7: Once they accept, the channel will be shared
🔯 Can you Create Multiple YouTube Channels?
Yes, you can create more than one YouTube channel using one Google account, that is, one Gmail ID. YouTube allows users to create multiple channels and the process for it is also very facile. You just have to go to the channel settings tab and select the Create a new channel link. And that’s it. Enter the name of your new channel and hit create and it’s ready.
Using the same procedure on the logged-in YouTube account, you can create more than one channel and work on it like the only one.
How To Create Multiple YouTube Channels With One Email:
The following method is best suited for the one, who already has one YouTube channel. If not, then also, it is not a very big deal. You can go with the steps and create a new channel.
Follow the steps to create another channel with the same Gmail:
Step 1: Open YouTube.com & Sign in
First of all, on your PC/Laptop, open “YouTube”. Go to Google Chrome and search YouTube. This link will directly open YouTube on the web. After opening, log in to your YouTube account. Log in using the Google account (Gmail) via which you want to create another channel. Sign in and enter your account.
If you already have a YouTube account, you can log in to that account as well.
Step 2: Click on the profile icon & select the first option ‘Your channel’
After entering your account, next, you have to go to your profile page, and then the ‘Your Channel’ tab. So, for that, click on the “Profile icon”, on the top right-most corner of the home screen. It looks like a circle with a colorful background and the initial letter of your name.
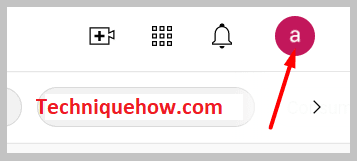
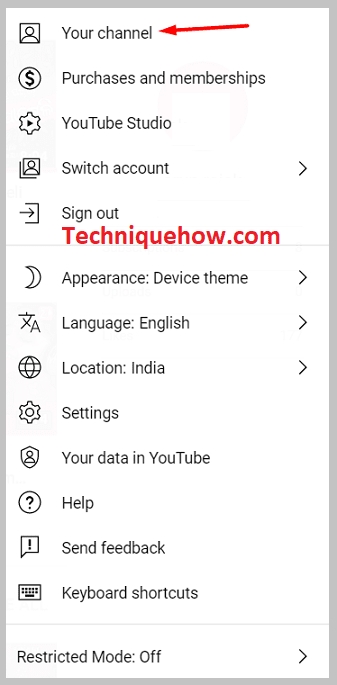
Click on it, and a list of options will come up there. From the list, select “Your Channel”.
Step 3: From the list, click on ‘Settings’
Now, on the ‘Your Channel’ tab, look towards the left section of the screen. Over there, you will find a long menu of options, such as – Home, Library, SUBSCRIPTIONS, etc. Scroll down the list and click on the “Settings” option at the end.
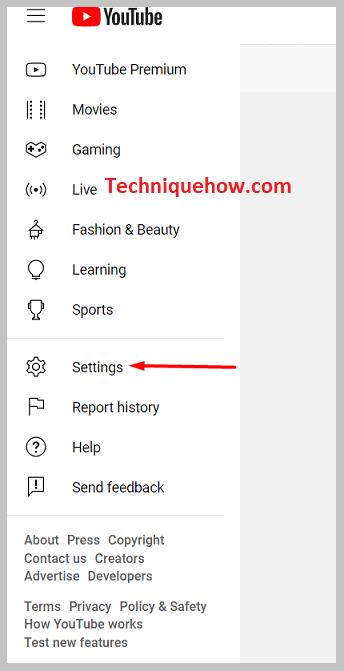
With this, you will reach the “Settings” tab of your YouTube account.
Step 4: Click on ‘Create a new channel’
Next, on the settings tab, click on the “Accounts” option on the left. It is the first option on the list. Click on it and the options will get open on the middle portion of the screen. There, come to “Your YouTube Channel” and there, under the ‘Your Channel’ section, tap on the “Add or manage your channel” link. On the next page, click on the “+ Create a Channel” box to go to the creation page.
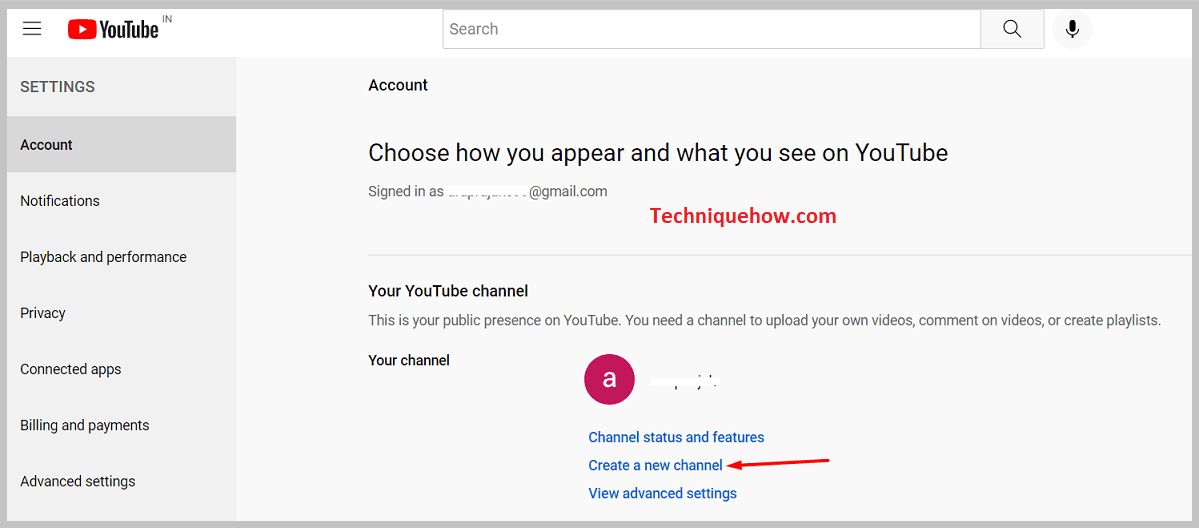
If you are creating a channel for the first time, the link will appear as “Create a channel”. Tap on the link and a new page will get open, with the instruction and field to create a new channel.
Step 5: Name it & click ‘Create’
With a click on the link, you will fall to the new page, where you have to enter the name of the new channel in the ‘Add channel name’ box. Tap on the box and enter the name. After that, tick the declaration > “I understand that I am creating_______” and at last, hit the > “Create” button below it.
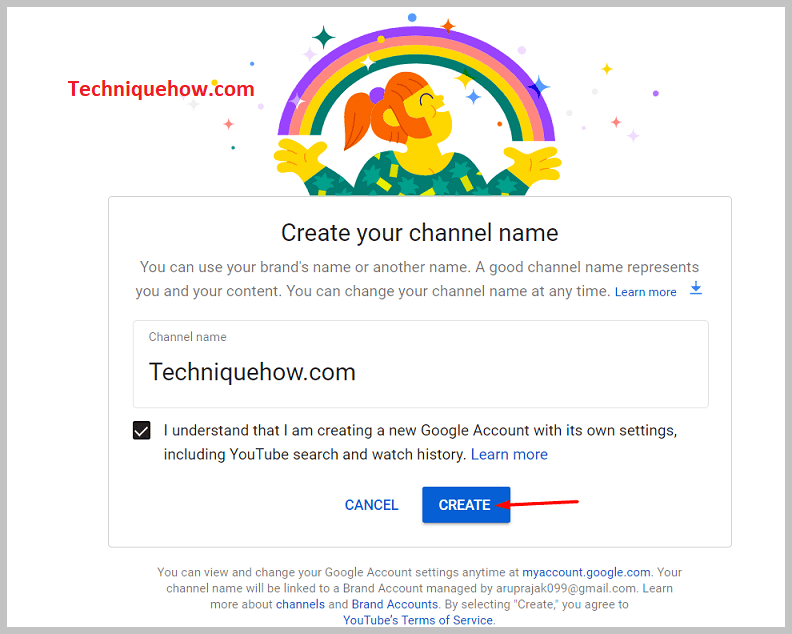
With this, your new YouTube channel is created and added to the previous one.
How to Add other managers to your YouTube channel:
Follow the steps:
Step 1: Open YouTube.com & Sign in
First of all, on your laptop, open “YouTube”. Go to Google Chrome and search YouTube. This link will directly open YouTube on the web. After opening, log in to your YouTube account using the Google ID on which you want to manage the channels.
Step 2: Click on ‘Your channel’
After entering your account, next, you have to go to your profile page, and then to the ‘Your Channel’ tab. So, for that, click on the “Profile icon”, on the top right-most corner of the home screen. It is a circle with the initial letter of your name in colorful background.

Click on it, and a list of options will come up there. From the list, select > the “Your Channel”.
Step 3: From the list, click on ‘Settings’
Now, on the ‘Your Channel’ tab, look towards the left section of the screen. Over there, you will find a long menu of options, such as – Home, Library, SUBSCRIPTIONS, etc. Scroll down the list and click on the “Settings” option at the end.

Step 4: From Channel managers > Add & remove the manager
Next, from the settings option list, tap on ‘Accounts’, and the options will appear in the middle section of the screen. Over there, you have to come down to the “Channel Managers” part under the “Your YouTube Channel”.
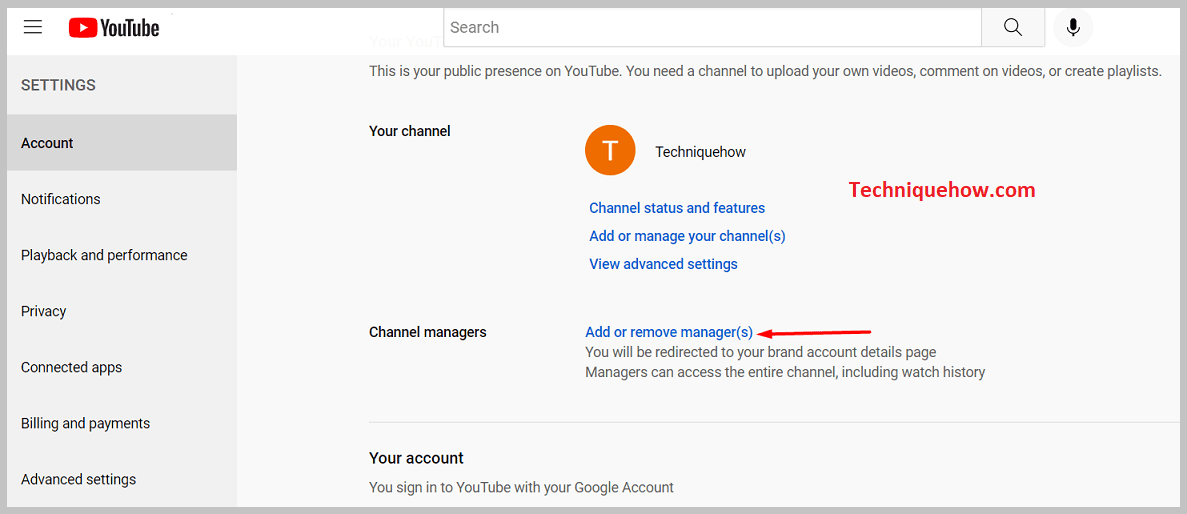
Now, click on the “Add & remove the manager” link in front of ‘Channel Manager(s)’. This link will take you to the “Brand Account Details”, on the Google Account page.
Step 5: Manage permissions & Sign in if confirmation needed
Thereafter, on the “Brand Account Details” page you will see your channel name first, and below it will be the “Users” and the “Manage Permission” button in blue.
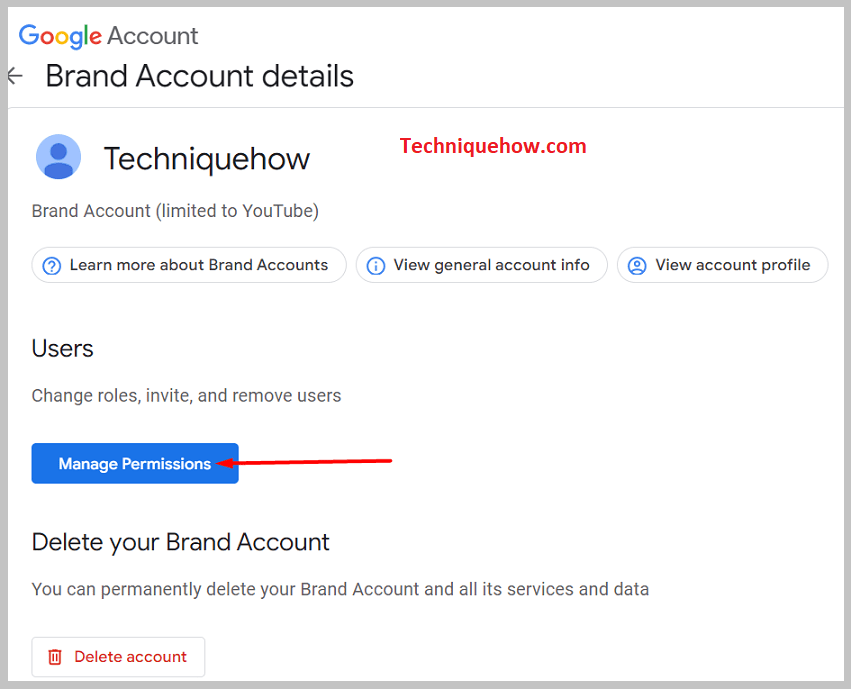
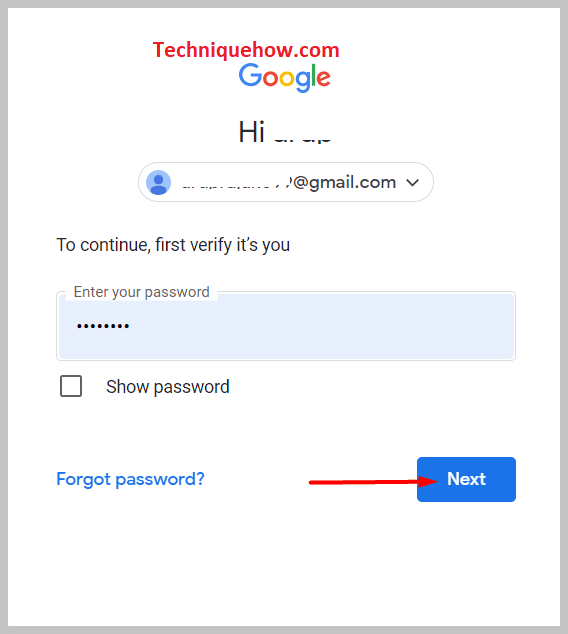
Next, you have to click on this button and enter the password for the logged-in Google account. This is a verification step. Enter the password and click > ‘Next’.
Step 6: Invite Users to Manage
Once the verification process is completed, the “Manage Permission” box will pop up on the screen. Now, click on the “Invite new users” icon at the top right-most corner of the box. The icon looks like a human body with a plus (+) symbol on it.
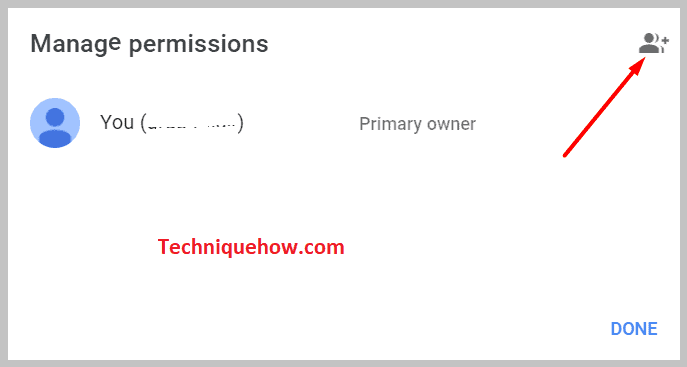
Click on it and enter, either the name or the email address of the person you want to invite as a new user. Next, click on the drop-down arrow below, and choose the role.
You can add multiple names in one go and choose the role. In the end, tap on the “Invite” button, and the invite will be sent to those people.
The channel and the details will be shared with them once they accept the invite. After accepting the invite, they can also manage the channel and see the activity, from their system.
