I still remember the day I almost lost years’ worth of photos pictures from family vacations, college days, and moments I didn’t even realize meant so much. They were all buried in my Facebook profile and Messenger chats. I had no idea how to get them out or even if I could. That’s when I realized: if you’re not backing up your photos, you’re risking losing them for good.
Whether you’re planning to delete your Facebook account, clean up your digital life, or just want offline access to your memories, saving your photos is a smart move. I’ve been through the process on both Android and desktop, and while Facebook doesn’t make it super obvious, the steps are actually pretty simple once you know where to look.
In this article, I’ll walk you through how to save individual Messenger photos on your phone, automatically back up pictures you take in the app, and even download every single photo from your Facebook account in one go. No complicated tech jargon just the steps that actually work.
If you’ve ever worried about losing your pictures or just want to keep them safe, this guide is exactly what you need. Let’s get started.
Contents
How To Save Multiple Photos From Facebook Messenger:
You can try the following methods below to save multiple photos from Facebook Messenger:
These are the photos that are sent or received (the shared photos) in a particular chat and these photos will be visible to you if you open the chat and can be saved on your choice.
🔴 Steps To Follow:
To save the sent or received photos from a Messenger chat,
Step 1: Open Messenger and tap on the name of that particular chat.
Step 2: You will see all the photos that are sent to the person as well as the received ones. Now just tap & hold and it will pop up with the option ‘Save’. Just tap on ‘Save’ to take it to your gallery.
Step 3: If you have multiple photos there in the chat repeat the same to save all these photos.
That’s all you’ve to do in order to save the photos in your gallery.
2. Using Downloader Extension
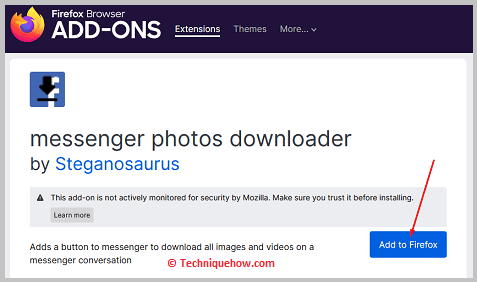
You can use the photo downloader extension of the Firefox browser.
This extension only works on the Mozilla Firefox browser. It adds a download button to download all the images and videos on Messenger.
🔗 Link: https://addons.mozilla.org/en-US/firefox/addon/messenger-photos-downloader/
🔴 Steps To Follow:
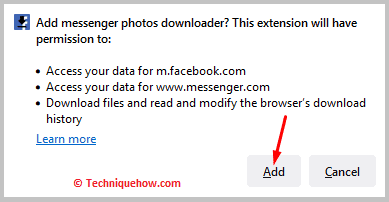
Step 1: You need to download the extension on the Mozilla Firefox browser.
Step 2: Next, you need to open the Messenger chat and go to the user’s profile page.
Step 3: There you’ll find the SHARED PHOTOS option.
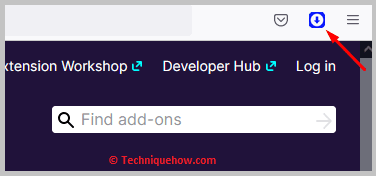
You need to click on it and all the pictures and videos in the conversation will be downloaded.
3. Facebook Messenger iPhone
If your iPhone has enough storage you can make it, this will make big use of your iPhone storage/iCloud storage.
If you’re on your iPhone and want to save the Messenger photos to be automatically saved on your iPhone gallery then you have to make a change in the settings.
🔴 Steps To Follow:
Step 1: First of all, open your Facebook Messenger app on your iPhone.
Step 2: After that, you will have to click on the Settings gear icon (you have to make changes there).
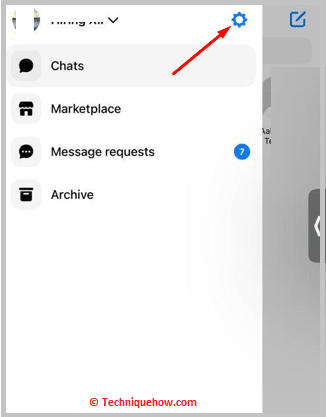
Step 3: Now scroll down and tap on the option ‘Save photos to camera roll’.
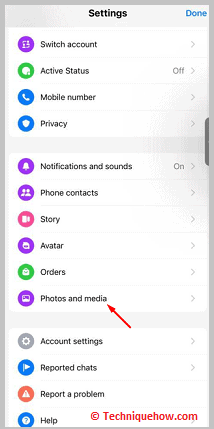
Step 4: Here you have to flip the switch option to the right to make the ON position.
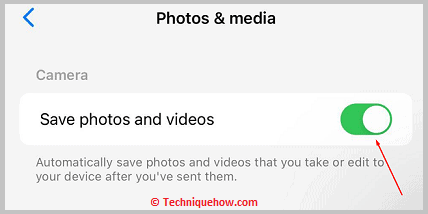
Step 5: Now this will save your recent images from Facebook messages automatically in your iPhone gallery.
That’s all you’ve to do to save the photos on your iPhone.
4. Downloading Chat History
If you want to bulk download all images from your Messages or chat or other stuff then downloading the whole data from Facebook is always would be a great decision.
🔴 Steps To Follow:
Step 1: Open your Facebook app and then go to the menu option which is available at the top right corner.
Step 2: Now, scroll to the bottom and find the settings and privacy options. Just tap on that specific option to proceed with the further step. Go to: Settings >> Your Facebook Information >> Download your information.
Step 3: Click on settings and scroll down to find the Facebook information.

Step 4: After that make sure to tap on download your information. You can choose the data that you want to download.
Step 5: Now click on ‘Select all’ and give a tick on the messages section. Just head on creating the file. When you are ready with the specific file then go for the download option.
That’s all you get the full data from your Facebook account, this may take time to get the download option, although you will get notified in your email.
How to Automatically Save Photos from Messenger:
1. Automatically Save Photos You Capture in Messenger
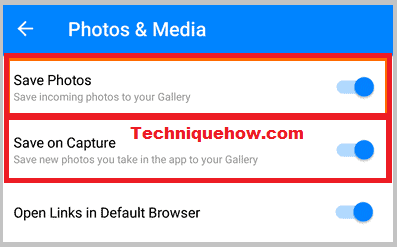
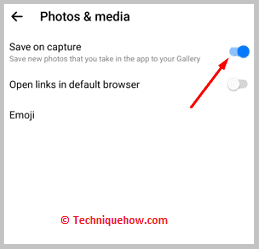
If you want to auto-save your pictures from Messenger to your phone’s gallery, you need to turn on the Save on Capture button from the Messenger settings. This switch allows users to automatically save all the pictures that they capture on Messenger.
Once you turn on this switch on Messenger you don’t need to manually save the pictures anymore which makes your job much easier.
🔴 Steps To Follow:
Step 1: Open the Messenger app.
Step 2: Click on the three lines icon at the top left corner.
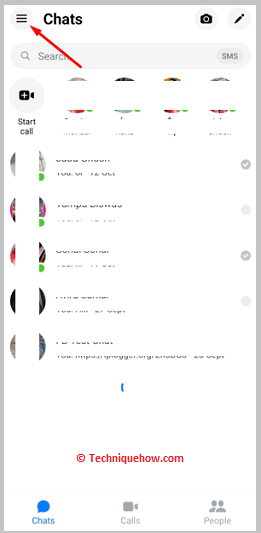
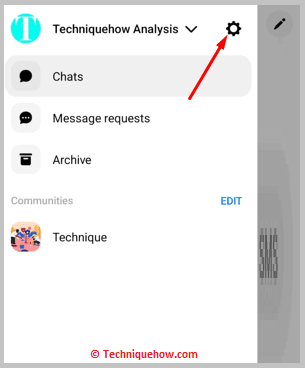
Step 3: Next, you need to click on your name.
Step 4: Then you need to click on the settings icon.
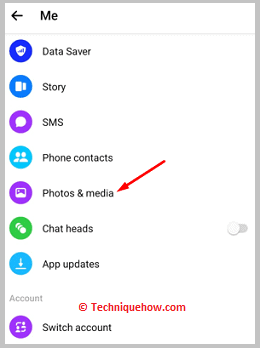
Step 5: Next, you need to click on the Photos & media option.
Step 6: Then, you need to enable the switch next to Save on Capture.
2.📱Save Photos Manually from Messenger
If you only need to save a few images from a conversation, this is the easiest route.
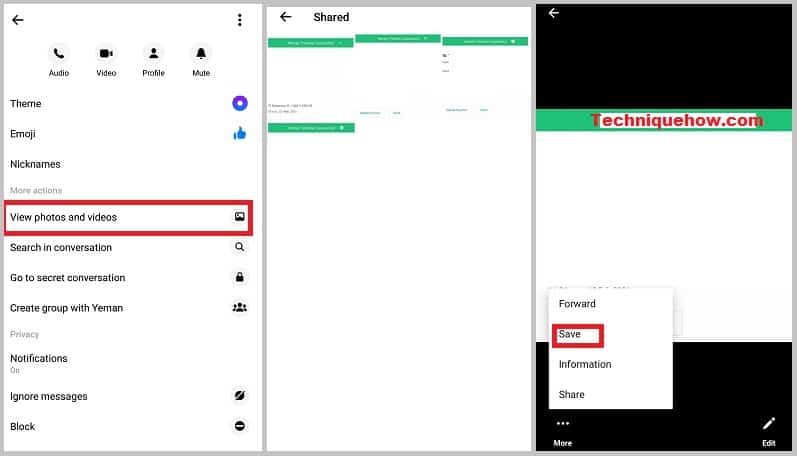
Step 1: Open the Messenger app and go to the conversation that contains the photo you want to save.
Step 2: Tap the profile or “i” icon at the top-right to open the chat settings.
Step 3: Tap “View media, files & links”, then select the image you want to save.
Step 4: Tap the three dot menu on the photo and choose “Save” to download it to your gallery.
Tip: You can’t save multiple images at once, so repeat this for each one you want.
Where to Find Saved Messenger Photos on Android
Once you’ve saved the image, you’ll want to know where it ends up.
Step 1: Open your phone’s Gallery or Photos app.
Step 2: Look for a folder named Messenger or Downloads.
Step 3: All saved images will appear in that folder.
Step 4: You can now edit, share, or move them like any other photo on your phone.
Conclusion
Saving photos from Facebook Messenger to your Android device is a simple process once you know where to look. Whether you’re manually downloading a few important images or setting Messenger to auto save the pictures you take, it only takes a few taps to get the job done. Just remember: Messenger doesn’t automatically save everything by default so taking a few minutes to adjust your settings can make a big difference.
By following the steps above, you’ll not only keep your favorite photos safe but also stay organized and avoid losing important files. And if you ever run into issues, double-check app permissions and your storage settings. Taking control of your Messenger media is a smart way to keep your digital life in order.
Frequently Asked Questions:
If you’re unable to save images on Messenger, you should try to clear the data of the Messenger application as it might be a memory issue. To clear app data, you need to head to the Settings of your device.
To save pictures that you receive on Messenger from other users, you’ll need to click on the image and then click on the three dots icon. You’ll need to click on Save to save it manually in your gallery.
Although you can’t directly download all photos from Facebook groups, you can certainly follow a few indirect techniques to download all the photos from any Facebook group. You can go to the Photos section of the group and then screenshot all the pictures one by one.
You’ll be able to download certain chrome extensions to do it too. You can add the chrome extension called DownAlbum on Chrome. It allows you to download bulk photos from all social media platforms. You can use it for free and unlimited times.
To download all photos from the Facebook page, you’ll need to open your Facebook account using a browser. You can download photos for a Facebook page of which you’re an administrator.
Currently, Messenger doesn’t allow saving multiple images in one go. You’ll need to save each photo individually. When you save your first image, you might get a prompt asking if you want to automatically save all future photos. Be cautious with this option if your device storage is limited. To save several pictures, repeat the saving steps for each one.
To select a batch of photos that are next to each other, click the first image, then hold down the Shift key while clicking the last one. Alternatively, you can hold Shift and use the arrow keys to extend the selection or drag your mouse to create a selection box over the photos.

