✎ Key Takes:
» You can request help from Facebook Support if your videos are unexpectedly removed, ensuring a prompt resolution.
» You can try Facebook Help and Support to report the issue, emphasizing the appropriateness of your content and adherence to guidelines.
Contents
How To Recover Deleted Live Video On Facebook:
There are a few ways that you can take to recover deleted Facebook videos:
1. Request to Facebook
If your uploaded video has been deleted from Facebook or has been deleted by Facebook itself for violating guidelines, copyright, or misleading content, you have a chance of getting it back by reporting the issue.
If you’re sure that your content wasn’t inappropriate or you haven’t violated any guidelines, you can take this matter to the Facebook help and support center.
You need to report to them the issue of your account being deleted by Facebook. You need to approach them & explain the issue that there is a mistake from their end and that your video was taken down without any actual reasons.
You’ve to claim the restoration of your video to the help center clearly by going to the Help and Support section.
After your request, the Facebook Help And Support team will look into the matter and they’ll get back to you with the result. If your video hasn’t violated any guidelines or it was not any kind of misleading or spam content then there are pretty good chances that the Facebook team would restore your video after reviewing the situation.
There are some ways to set settings to never delete live videos on Facebook.
2. iCloud backup
If you’ve used your iPhone to upload the video, then you have got the option to recover your iPhone data from the iCloud backup section. It stores all your backed-up data which you need to restore to get back your removed Facebook video.
To do that you’ve to act and follow the exact steps that are explained below:
Step 1: You’ve to install the iPhone Data Recovery on your computer and launch it.
Step 2: Next, you need to plug in a USB cable and connect your computer to your iPhone.
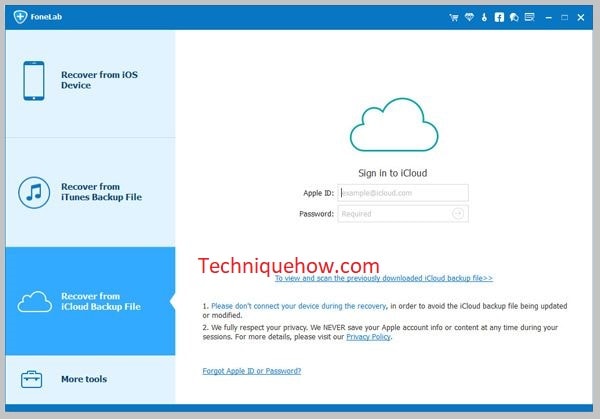
Step 3: Click on the Trust option on the pop-up notification.
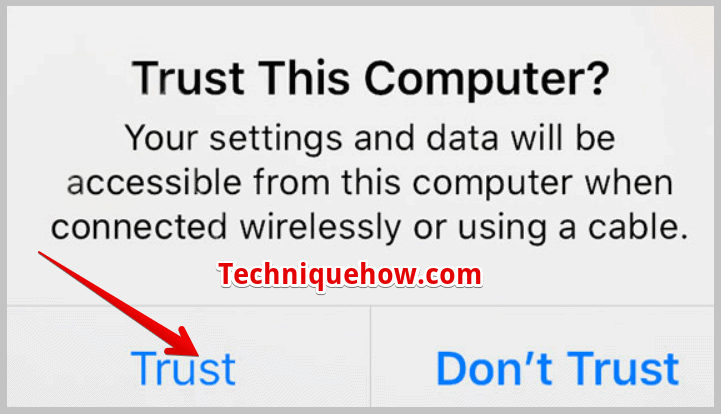
Step 4: Next, you need to choose the option Recover From iCloud Backup.
Step 5: Then you’ve to login into your iCloud account using the correct details.
Step 6: You’ll be flashed with the backed-up data file.

Step 7: Next, you’ve to download the backup file on your computer to extract the photos or videos from it.
You need to choose and click on the video that you need to restore/re-upload and it will be restored in that way.
3. Recover from Archive settings
Another effective way to recover your removed Facebook video is by restoring it from the archive settings. To do that you’ve to download all your Facebook data from the archive settings to find the deleted video to recover it.
Here are the steps you need to perform to successfully recover the removed Facebook video from the archive settings:
Step 1: Open the Facebook account.

Step 2: Log in to your account.

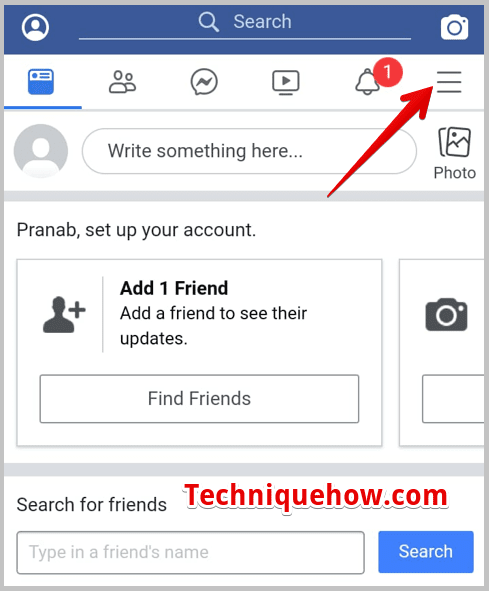
Step 3: You need to click the downside arrow at the top right corner of the screen.
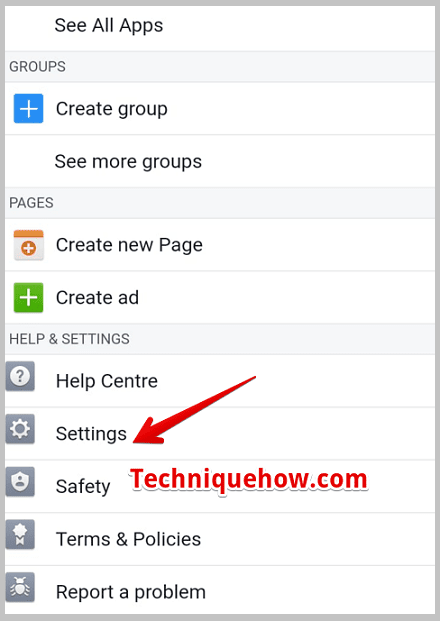
Step 4: Next, select the Settings option and you’ll be taken to a new page.
Step 5: In the General section, you’ll find a hyperlink to Download a copy of your Facebook data. You’ve to click on it.
Step 6: Next, you need to click on the Start My Archive option under the Download Your Information section. Your screen will show you a pop-up notification of Request My Download. Confirm it.
Step 7: After the successful download, you’ll get an email from Facebook. It will have an attached link at the end of the mail. Click on it.
Step 8: Next, click on Download Archive and then enter your password. Now all your Facebook photos, videos, and messages are saved in a zip file from where you can restore whichever you want after extracting the file.
You can unzip the file anytime to restore any data you need.
Where To Find Deleted Live Videos On Facebook:
Once a live video is deleted on Facebook, it cannot be recovered directly from the platform. Facebook does not provide a built-in feature or tool to retrieve deleted live videos. Once you delete a live video, it is permanently removed from your profile or page.
However, if you had previously downloaded or saved the live video, you may be able to find it on your device or storage.
Using a tool, you can try retrieving live videos that may have been removed from your profile or page. It can help you recover those precious moments that you thought were lost forever.
🔴 Steps To Use:
Here’s how you can use FB Recover Live Videos:
Step 1: First, go to the official website of FB Recover Live Videos.
Step 2: Then, find the option that says “Get Started” on the website. Click on it to proceed.
Step 3: Click on “Sign In” to log in to your Facebook account using your credentials. This is necessary to access your account’s data and retrieve the deleted live videos.
Step 4: Now, you’ll be presented with a solution on the FB Recover Live Videos tool. It will scan your account and display any deleted live videos that it can recover.
Step 5: On the tool’s dashboard, you’ll find various options to execute the recovery process. You can select the specific live videos you want to recover and click on the “Recover” button to start the retrieval. The tool will work its magic and attempt to recover your deleted live videos.
